Jasper Lake Fanless Showdown: ECS LIVA Z3 and ZOTAC ZBOX CI331 nano UCFF PCs Review
by Ganesh T S on July 8, 2022 8:30 AM EST- Posted in
- Systems
- ZOTAC
- Fanless
- ECS
- Passive Cooling
- UCFF
- Mini-PC
- Jasper Lake
Teardown and Thermal Design Analysis
Systems processed through our evaluation routine are first completely benchmarked prior to any teardowns. This ensures that we do not negatively impact any of the thermal solutions intended by the manufacturer. The details presented in this section were gathered after completing at least one benchmarking pass. However, the results of the evaluation (presented in later sections) needs significant thermal design context. Keeping that in mind, we opt to present the teardown and thermal design analysis ahead of the benchmark sections.
ECS LIVA Z3
The chassis of the ECS LIVA Z3 has a metal underside and a polycarbonate top. It is simple to disassemble - the underside is easily removed by taking out the four screws at the corners. This also needs to be done to get access to the SODIMM and M.2 2280 NVMe slots. The metal underside has a pre-mounted thermal pad to cool down any installed M.2 drive. There is also a small flap integrated on to the plate to allow for airflow.
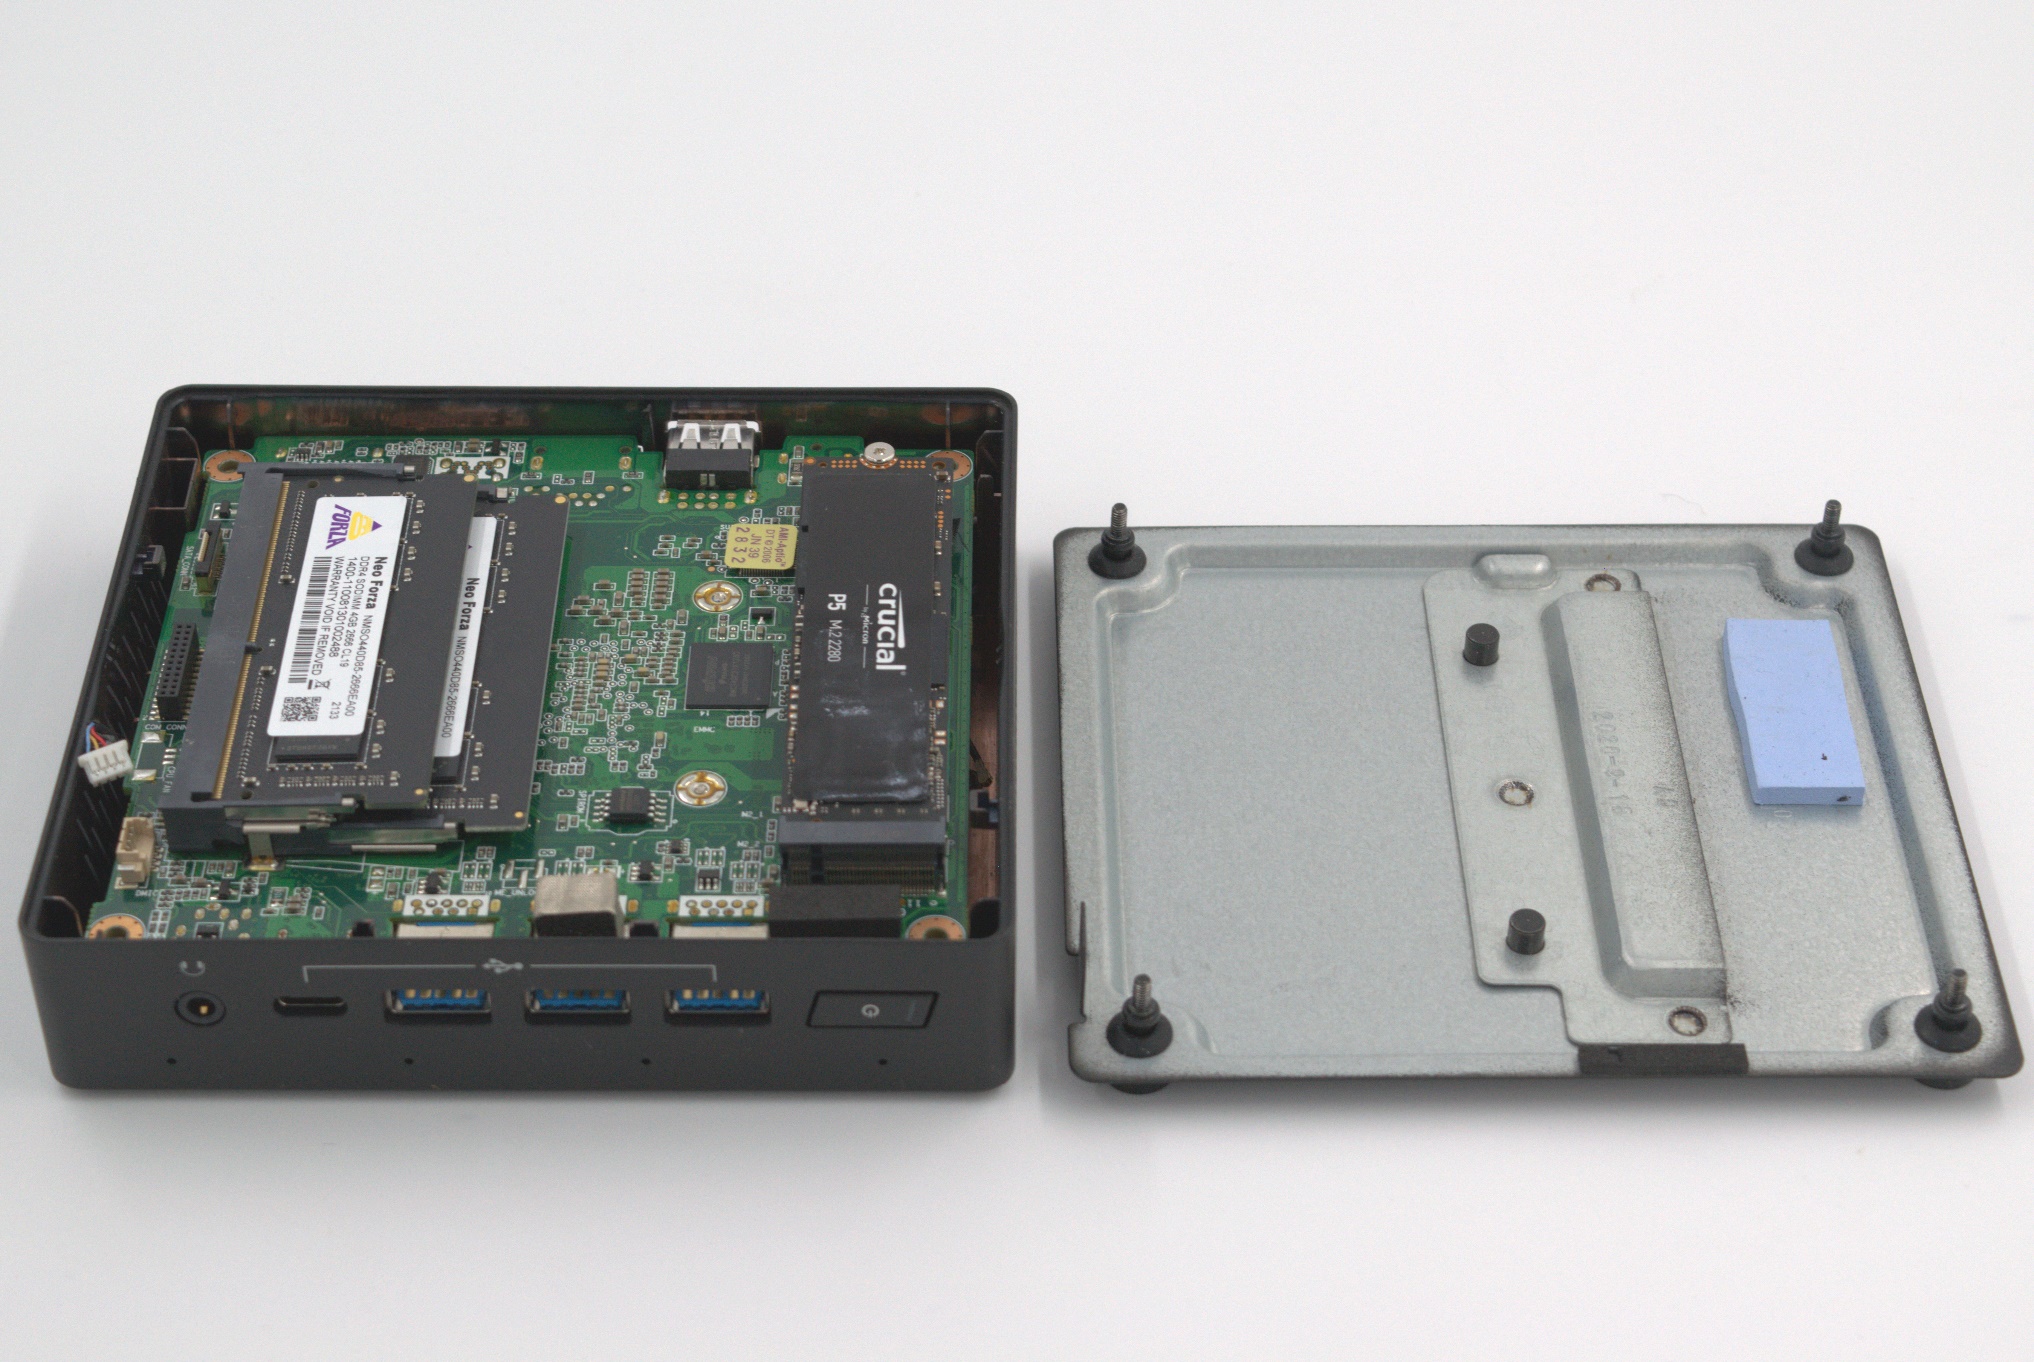
The board has no additional mounting to the plastic top, and can be easily prised out by flexing the rear panel. Prior to that the DMICs connection to the board and the pigtail antennae connected to the M.2 WLAN card need to be disconnected.
The metallic glint on the underside of the top panel of the chassis above is highly misleading. The plastic top is completely covered and the only ventilation slots are on the sides. While the heat sink place on top of the board seems good enough to cool down a 6W TDP processor, the absence of ventilation slots on top appears strange at first glance. The closed nature makes convective cooling to draw the heat away from the thermal module challenging.

The Jasper Lake package can be seen bathed in thermal paste under the thermal module. Though Intel claims Jasper Lake to be a SoC (system-on-chip) in its documentation, we can see that it is technically a SiP (system-in-package) with two distinct dice - the processor and iGPU on top, and the Jasper Point PCH below it.
The first benchmarking pass results of the ECS LIVA Z3 were quite strange - often the system actually performed significantly worse than the ECS LIVA Z2 based on Gemini Lake. After suspecting thermal throttling due to the lack of convective cooling for the thermal module, we decided to repeat all the benchmarking for the bare board - i.e, with the top of the chassis removed and the DMICs / WLAN functionality discarded. The numbers for this configuration are referenced using ECS JSLM-MINI (the motherboard's model name) in the relevant sections.
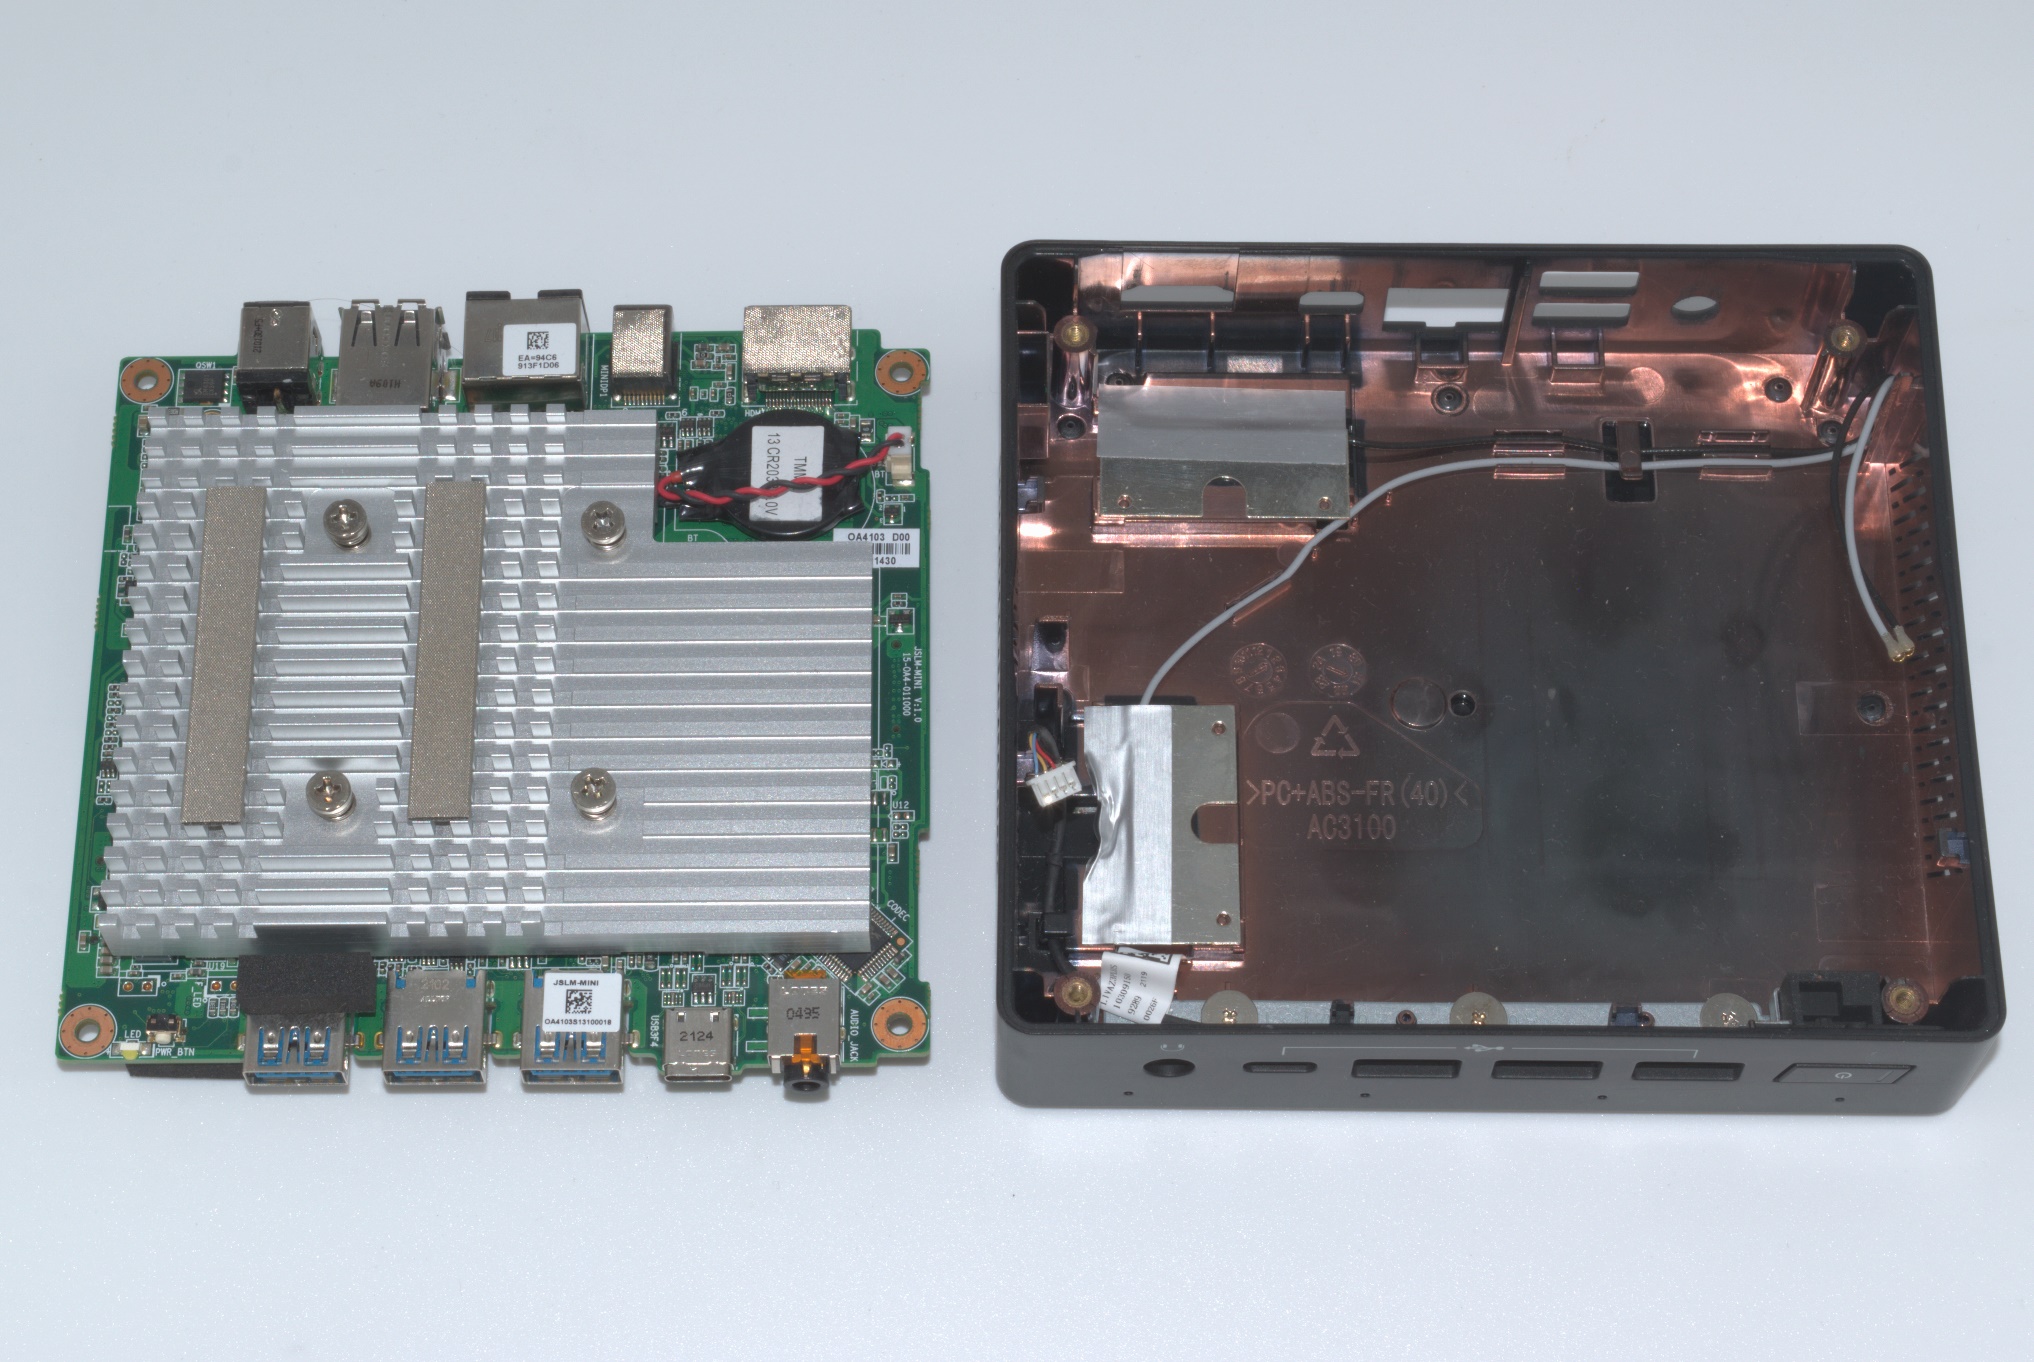
ZOTAC ZBOX CI331 nano
ZOTAC adopts a tool-less design, with the rubber feet doubling up as screws. They can be easily removed to access the underside of the board with the SODIMM slots and 2.5" SATA drive bay.
Further disassembly requires voiding the warranty by unscrewing the metal frame that holds the SATA caddy in place along with the motherboard standoffs. The standoffs themselves need to be removed using an uncommon screwdriver bit (thankfully, had it handy in the Mushkin Redline Screwdriver Toolkit).

The rear panel can then be snapped off (held by plastic tabs). The next step involves taking out the spring-loaded screws fastening the board to the heat sink, and this leads to a free board, as shown above.
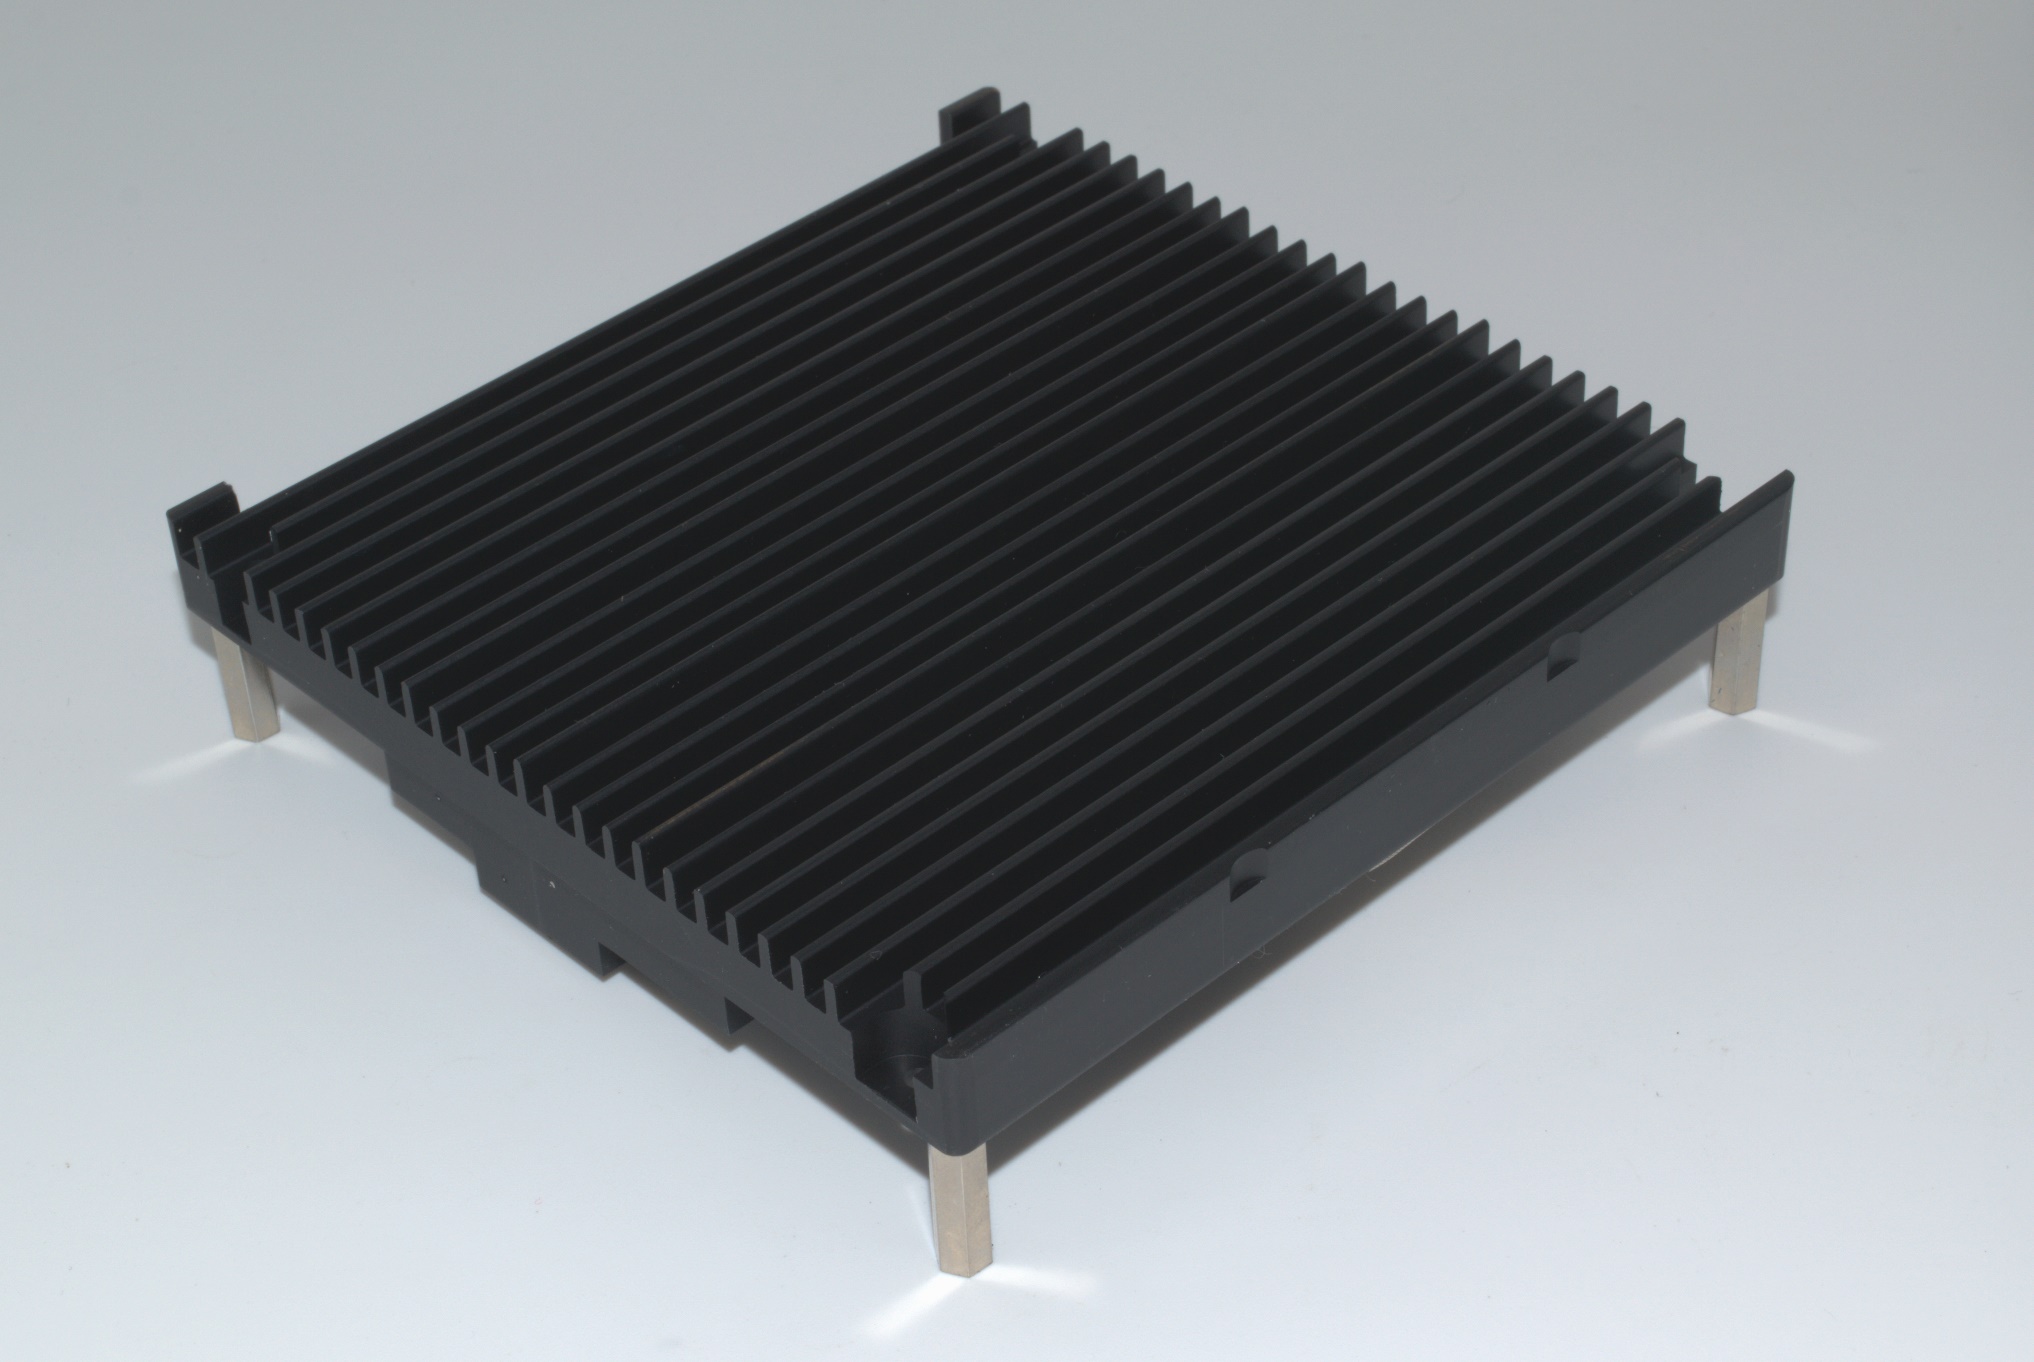
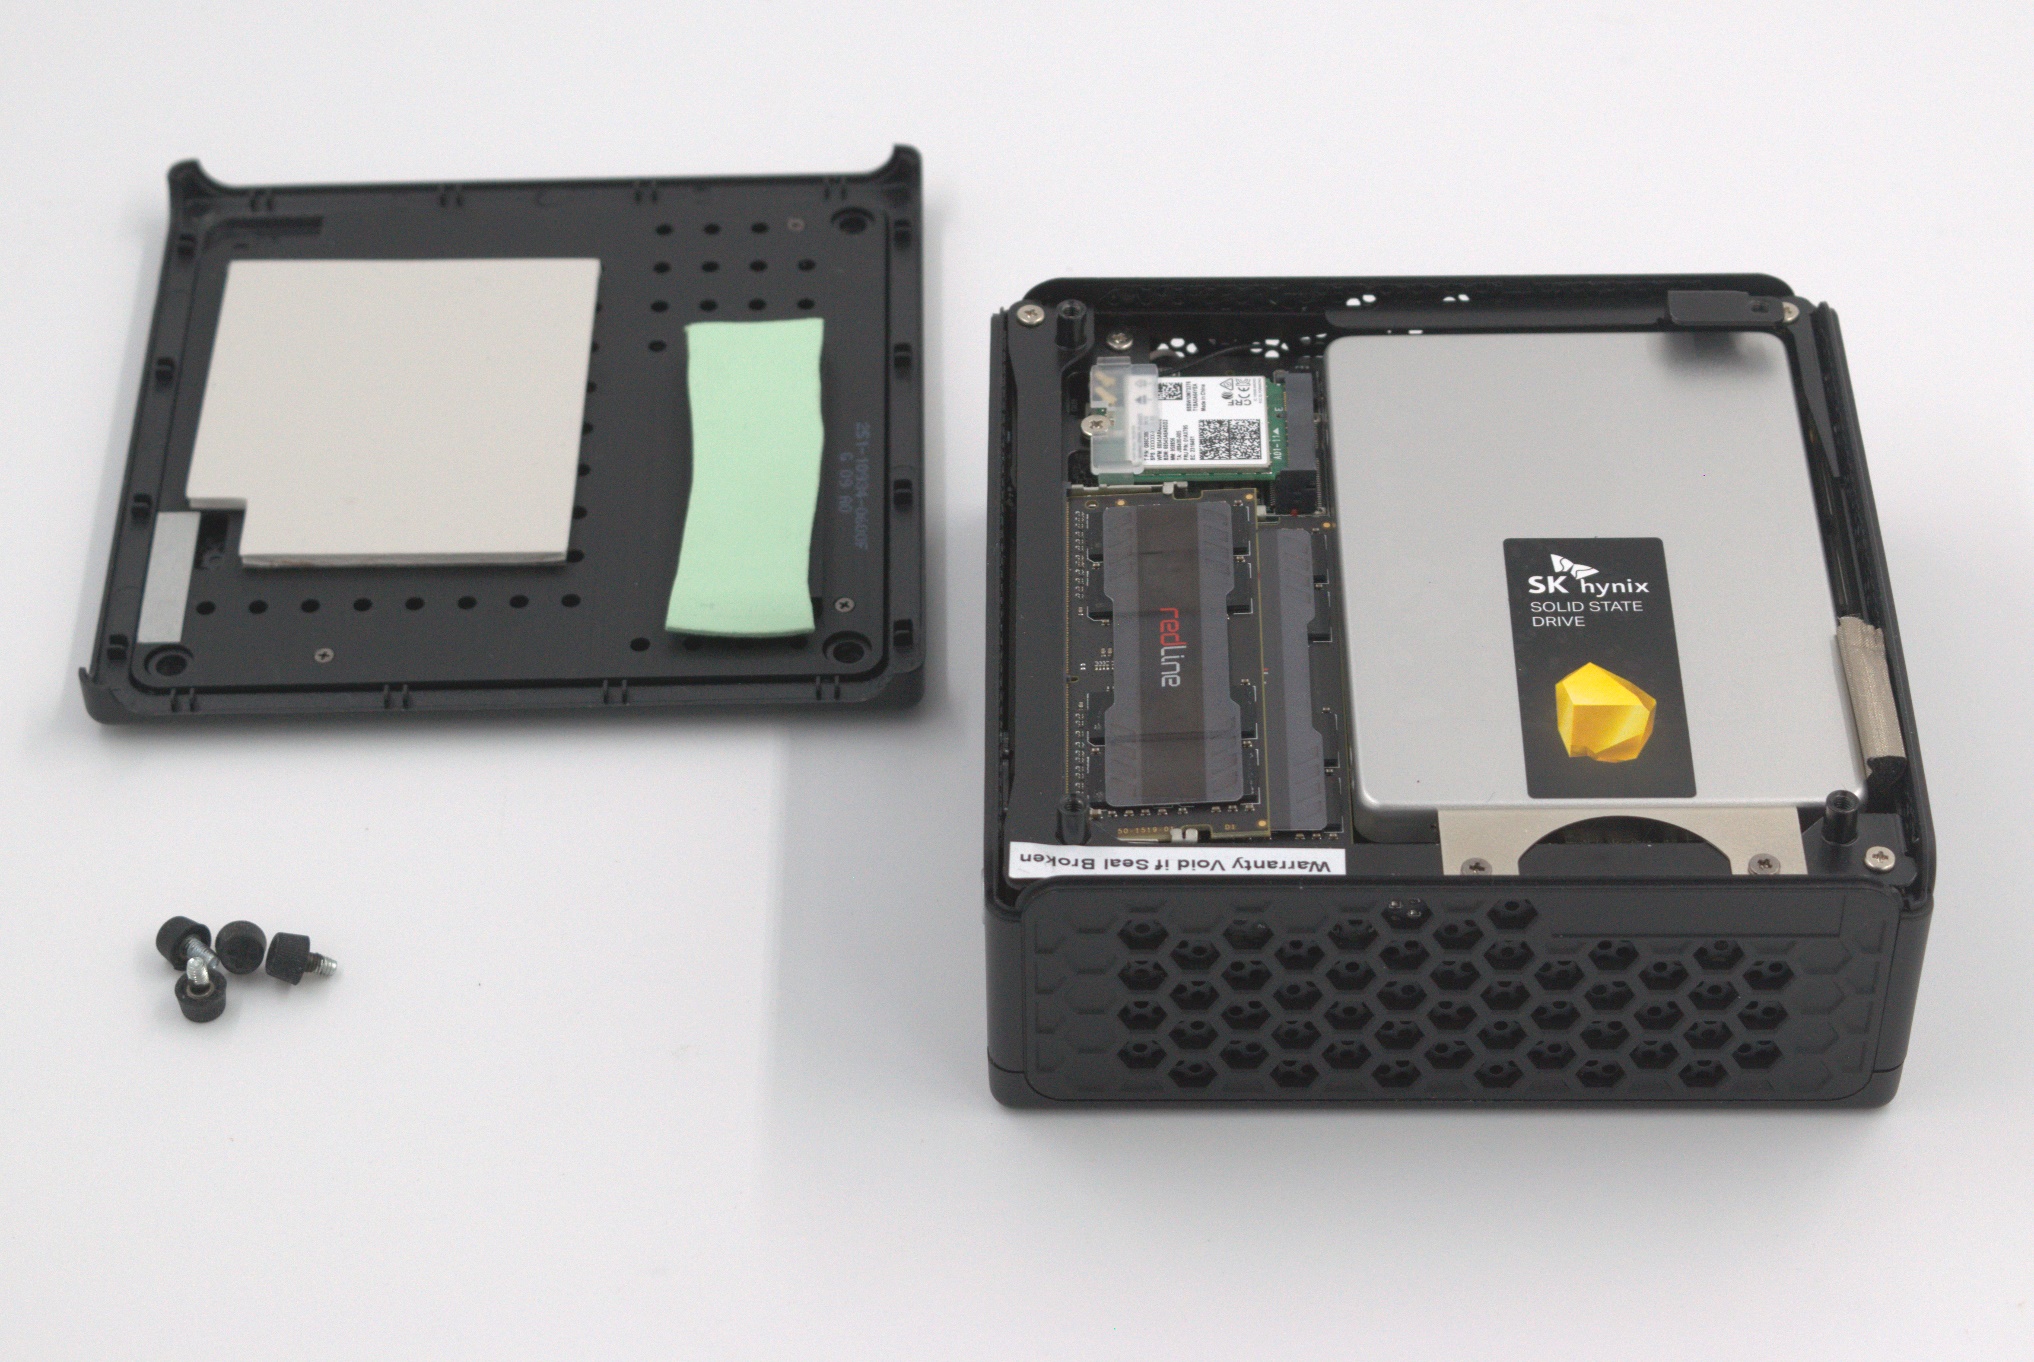
The heat sink is connected to the perforated plastic chassis using four small screws. which are straightforward to take out. The heat sink is quite heavy compared to the ECS LIVA Z3's thermal module. It has ridges right under the perforations - this allows increased area for heat dissipation, and the perforations allow for convective cooling.
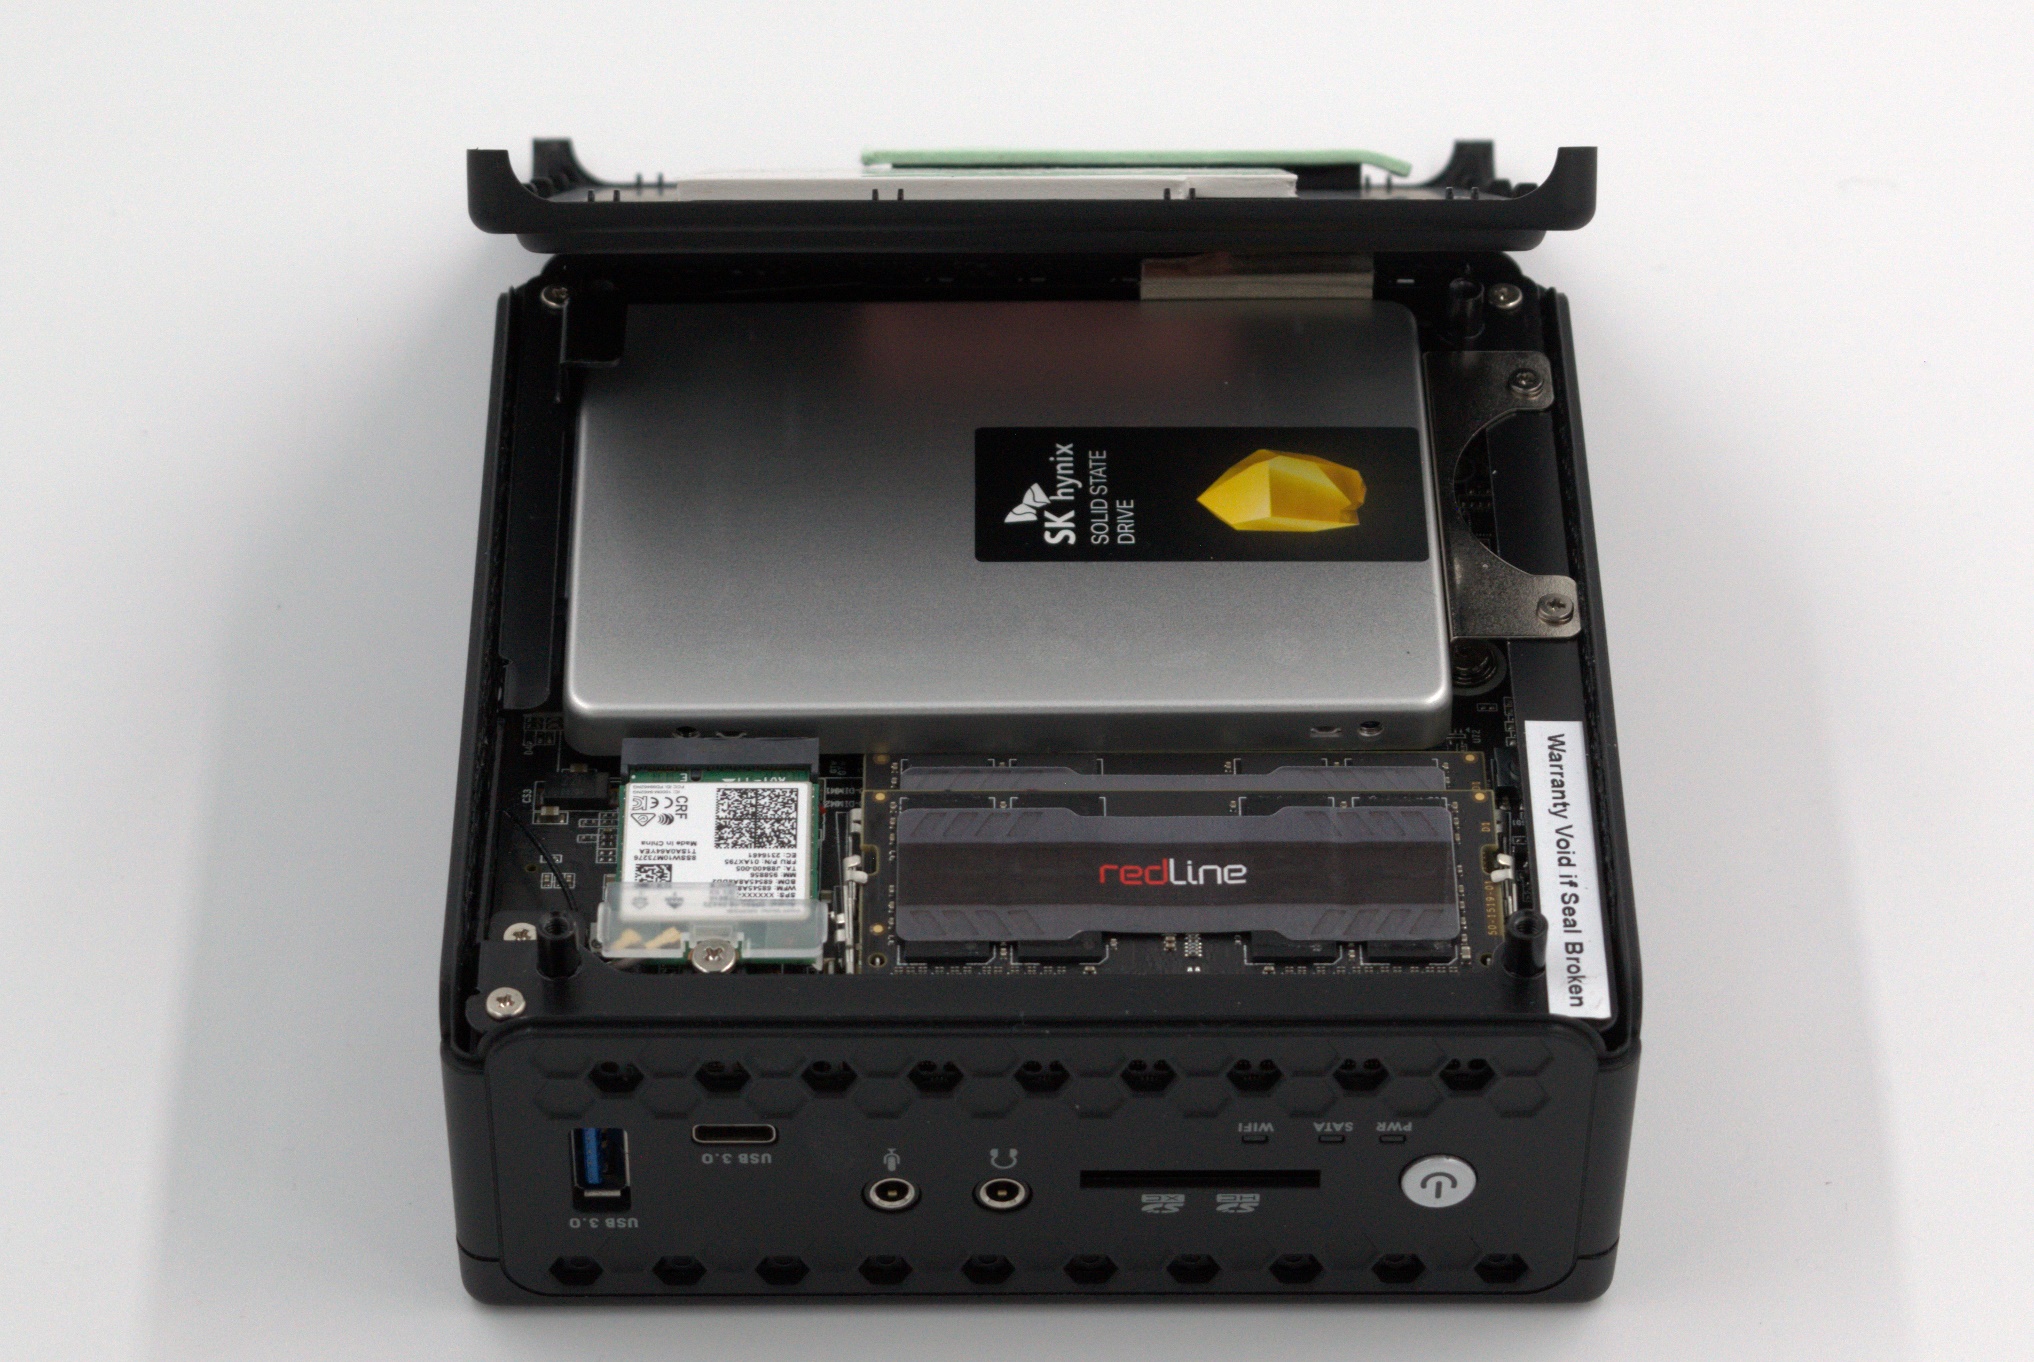
Our main grouse with the thermal design of the ZBOX CI331 nano is the cooling support for the 2.5" drive. Typically, SATA drives do not get significantly hot. However, the underside of the ZBOX has almost no ventilation support. While a quantitative evaluation of the storage cooling mechanism is available in a later section, the problem in the hardware is brought out in the above picture. The green thermal pad attached to the raised block on the underside cools down the SODIMMs. The protection for the SATA drive is activated by affixing the thermal pad supplied in the package to the metal plate on the underside. However, it doesn't possess enough thickness and there is invariably an air gap between the top of the SATA drive surface and this pad. As a result, there is a bit of a compromise in the cooling for the 2.5" drive.
In the next section, we take a look at the system setup and follow it up with a detailed platform analysis.


52 Comments
View All Comments
Oxford Guy - Monday, July 18, 2022 - link
‘No, you're flat-out wrong’That’s nice.
imofullform - Thursday, July 21, 2022 - link
Nice Post