ASRock X99 WS-E/10G Motherboard Review: Dual 10GBase-T for Prosumers
by Ian Cutress on December 15, 2014 10:00 AM EST- Posted in
- Motherboards
- IT Computing
- Intel
- ASRock
- Enterprise
- X99
- 10GBase-T
The ASRock BIOS and software has changed little since our review of the ASRock X99 WS, and hence is updated here with the WS-E/10G specific information.
ASRock X99 WS-E/10G BIOS
The ASRock BIOS shifted slightly between Z87 and Z97, and it is the Z97 implementation we get on X99. This means the starry background is gone, replaced with a dark and blue-crystalline image. The icons are also reduced to mere text with a small image and the menu sections are of equal size which I prefer. There is also an adjustment to the OC Tweaker layout, which we will come to.
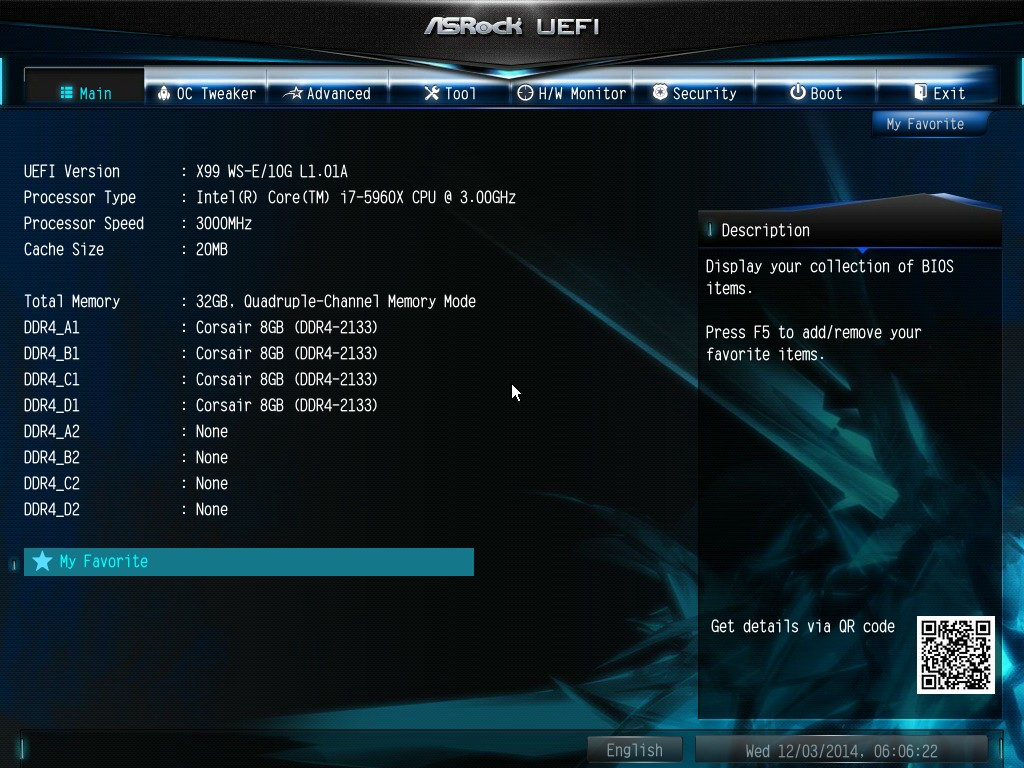
There is no ‘Easy Mode’ for the ASRock BIOS, with entry direct into this first Main screen. The right hand side of the BIOS is for description of the option selected, and the main segment shows information such as the BIOS version, CPU installed, CPU speed and memory installed. As mentioned in previous reviews, having some set of information relating to CPU voltages, temperatures and fan speeds might be useful here. If ASRock was to do an Easy Mode, it would make sense to have a one-button overclock option as well.
OC Tweaker takes heed of one of my previous complains about the ASRock overclock options. Previously there used to be a long list of options that continuously grew, depending on what options were left open to the user. For X99, ASRock has condensed these options into separate submenus similar in design to those we see on a GIGABYTE motherboard. Note that ASUS and MSI BIOSes currently go half-way between these extremes, offering some basic options with the more advanced ones in separate menus.

ASRock cuts straight to the chase – the first two options deal with overclocking. We have touched on features like Multi Core Enhancement many times previously, but it is interesting to have it so high up on the list of options. The Optimized CPU OC Setting gives some easy selections for overclocks based on ASRock’s internal testing:
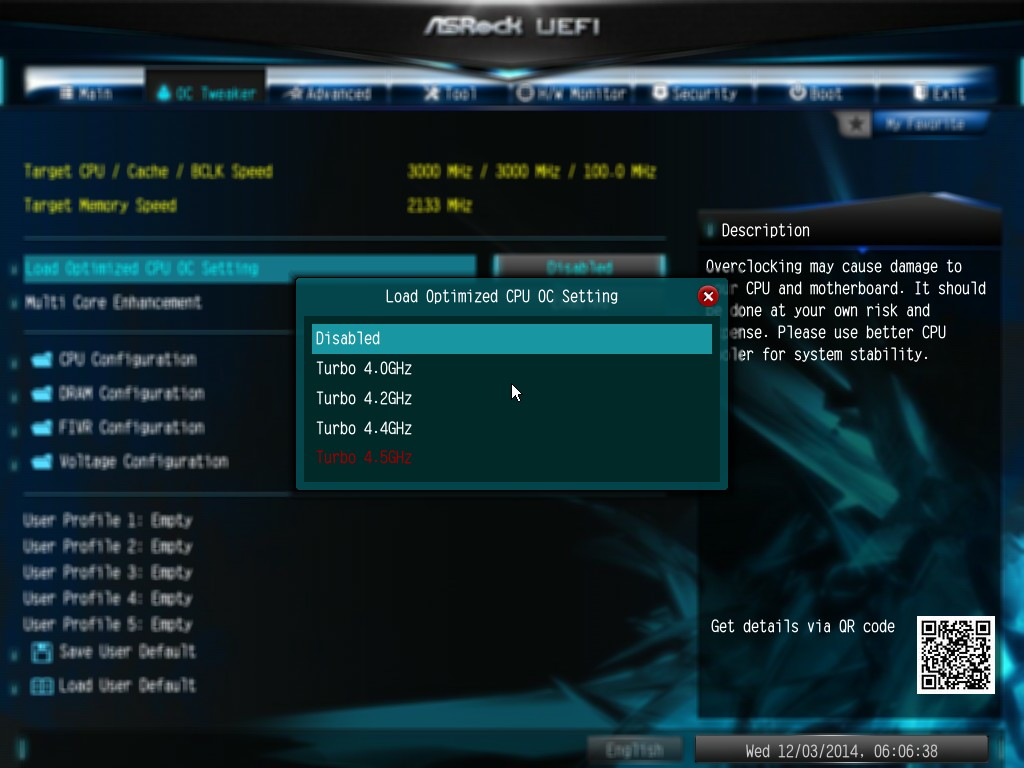
In line with our overclock testing, 4.0 GHz and 4.2 GHz should be achievable by all CPUs, with 4.4 GHz by most and 4.5 GHz by around half, given sufficient cooling methods.
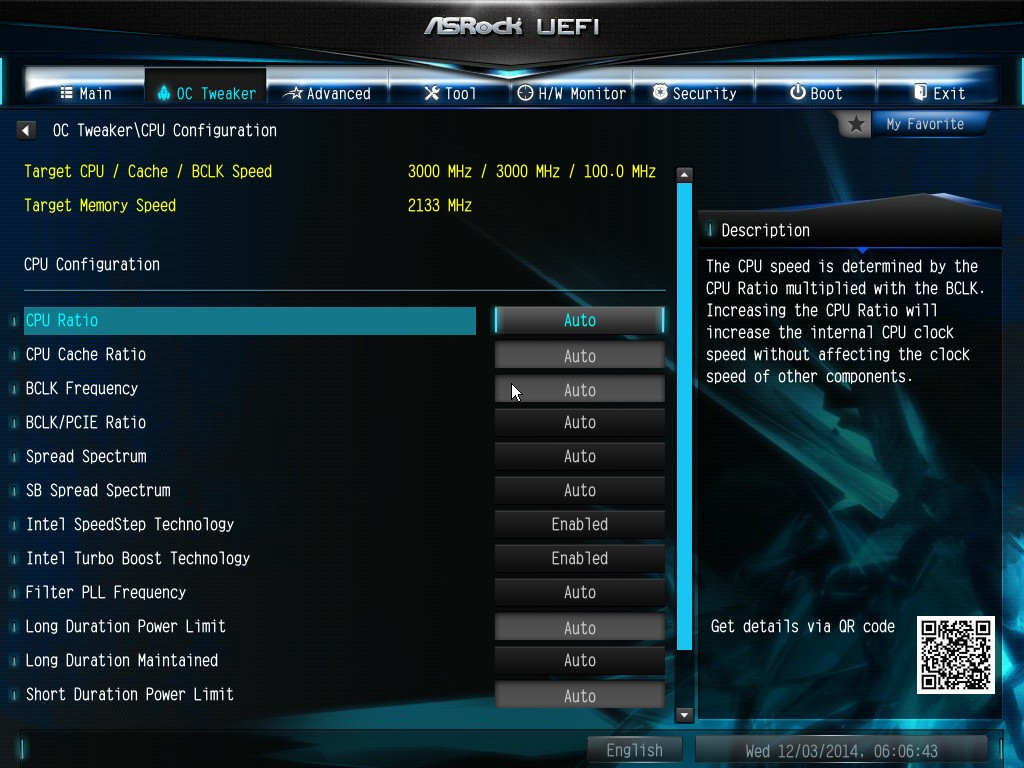
The OC Tweaker menu is split into four sections. CPU Configuration gives options for CPU Ratio, multiplier, frequency, turbo boost and power limits:
DRAM Configuration allows for XMP application, DRAM strap adjustment, DRAM voltage and sub-timing adjustment, all the way through primary timings, secondary timings, tertiaries and others.
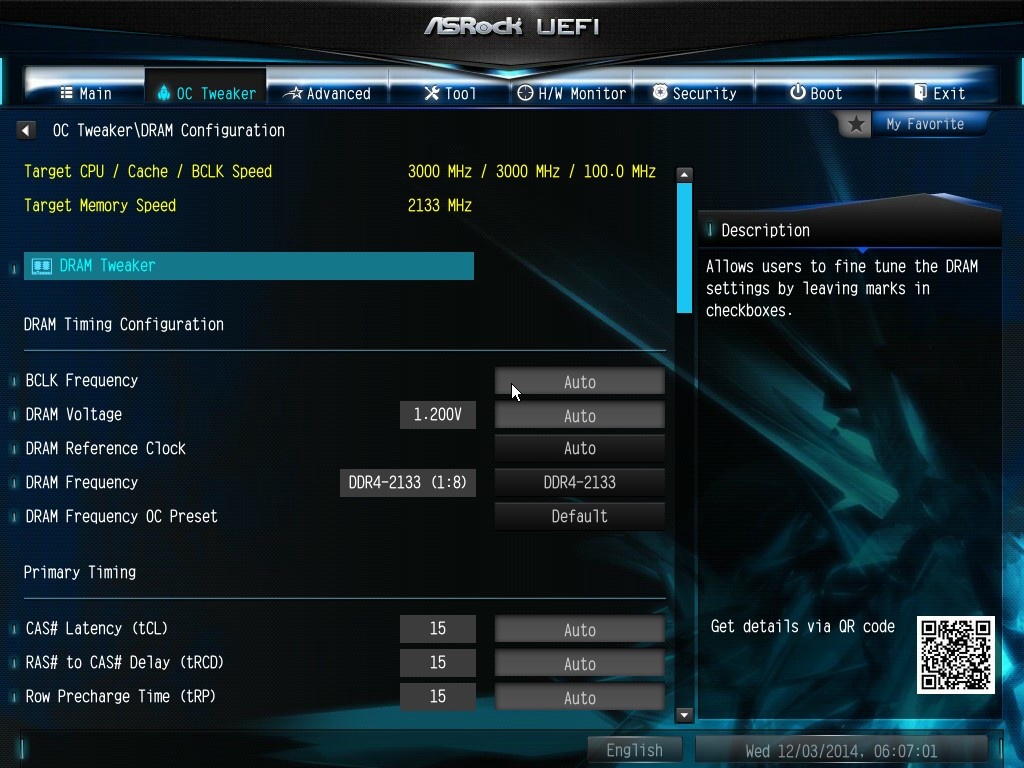
ASRock still uses the DRAM Tweaker function to fine tune the JEDEC and XMP responses to each memory kit. The ASRock BIOS also offers a DRAM Frequency overclocking preset list which will adjust the CPU strap and BCLK frequency needed to achieve various speeds.
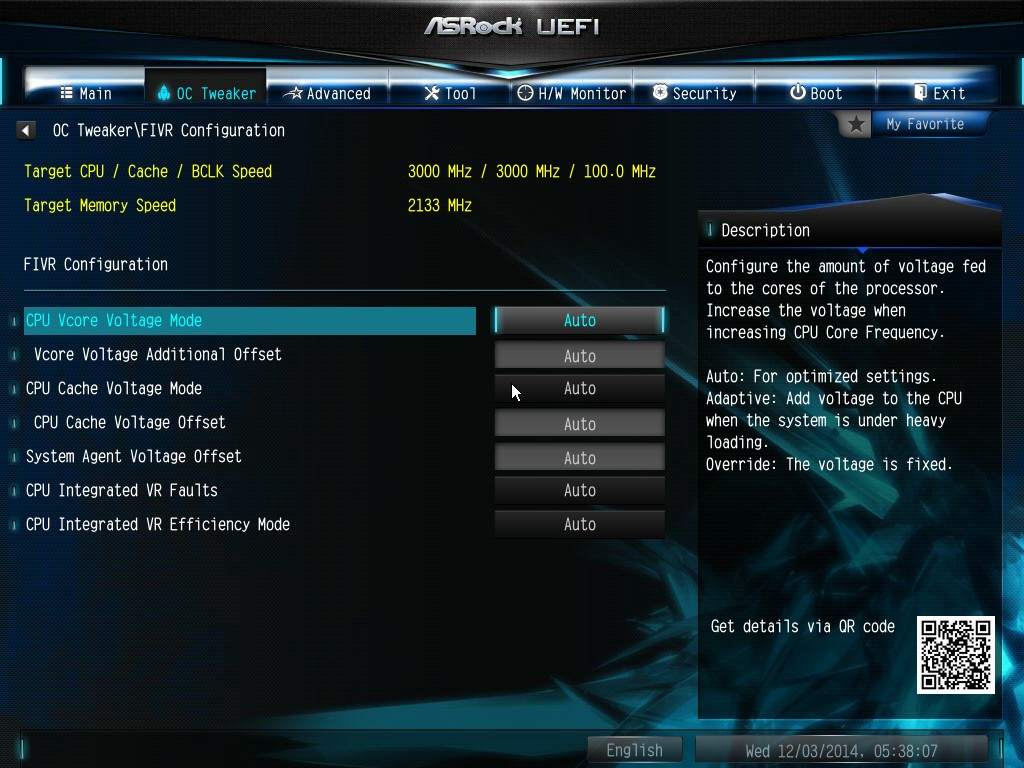
The FIVR Configuration menu from the OC Tweaker page deals primarily with the CPU and CPU Cache/uncore voltages.
The Voltage Configuration menu has the other voltages on the system, including VCIN to the FIVR and load line calibration. The Load Line Calibration option also comes with a handy graph showing what each setting means:
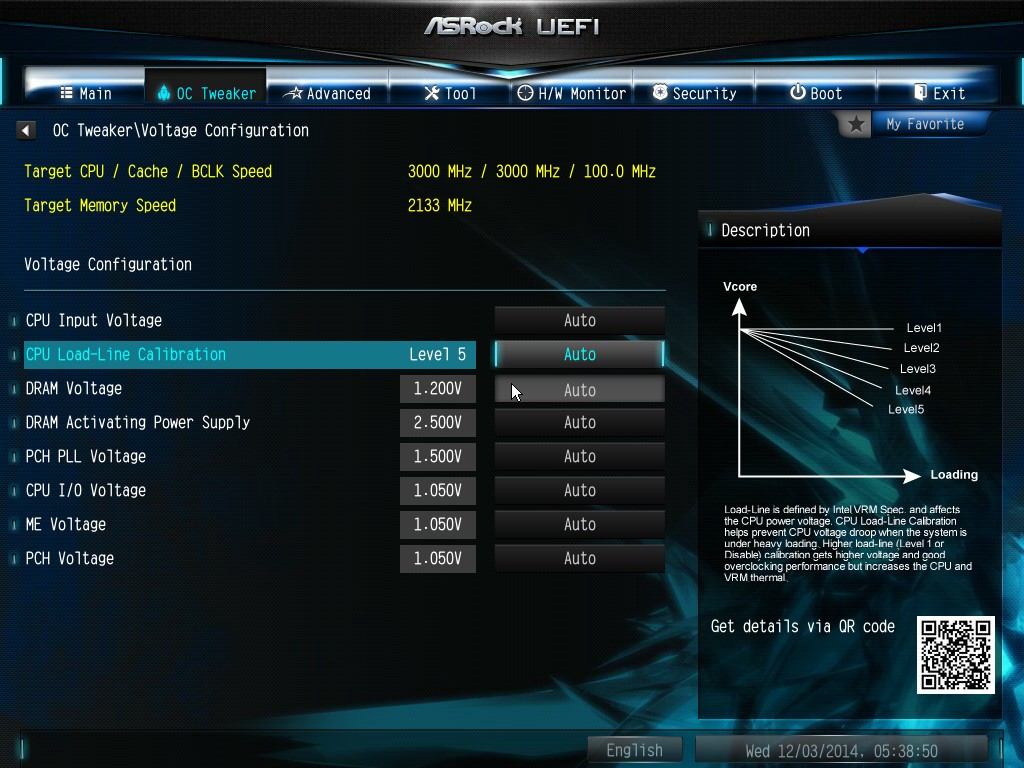
Unfortunately this arrangement of voltages is mildly confusing. Typically an overclocker will adjust the CPU voltage and the Load Line Calibration settings enough to get the right combination, and ASRock has placed these options in two different menus. If the CPU VCore option could be duplicated in the Voltage Configuration menu, this would be preferable.
The Advanced tab deals with other elements of the system configuration, such as the chipset, storage and super IO calibrations. This includes fixing power modes, PCIe linking speeds, disabling or enabling onboard controllers and adjusting RAID configurations.
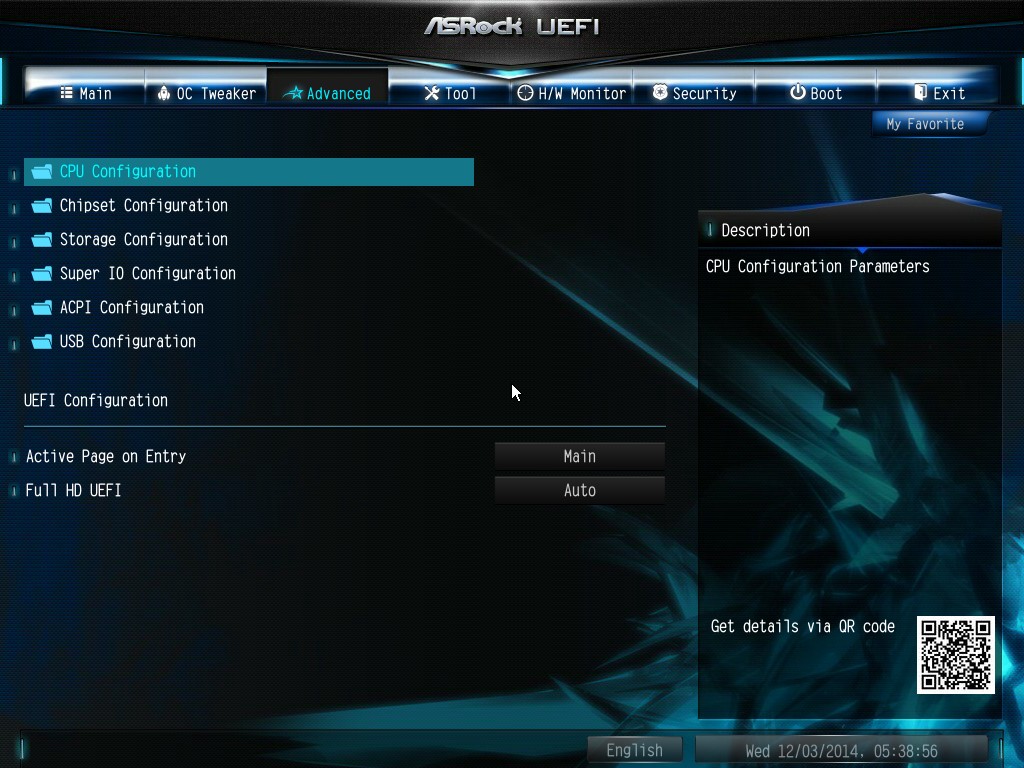
An adjustment to the X99 WS BIOS is that the Active Page on Entry setting has been moved here.
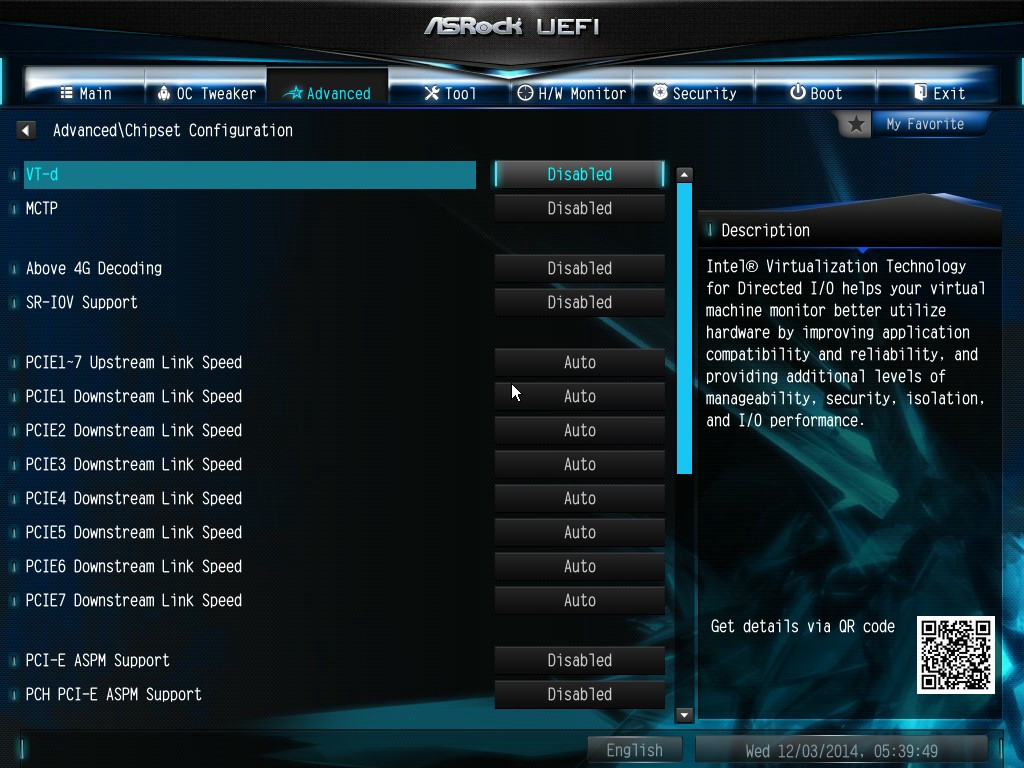
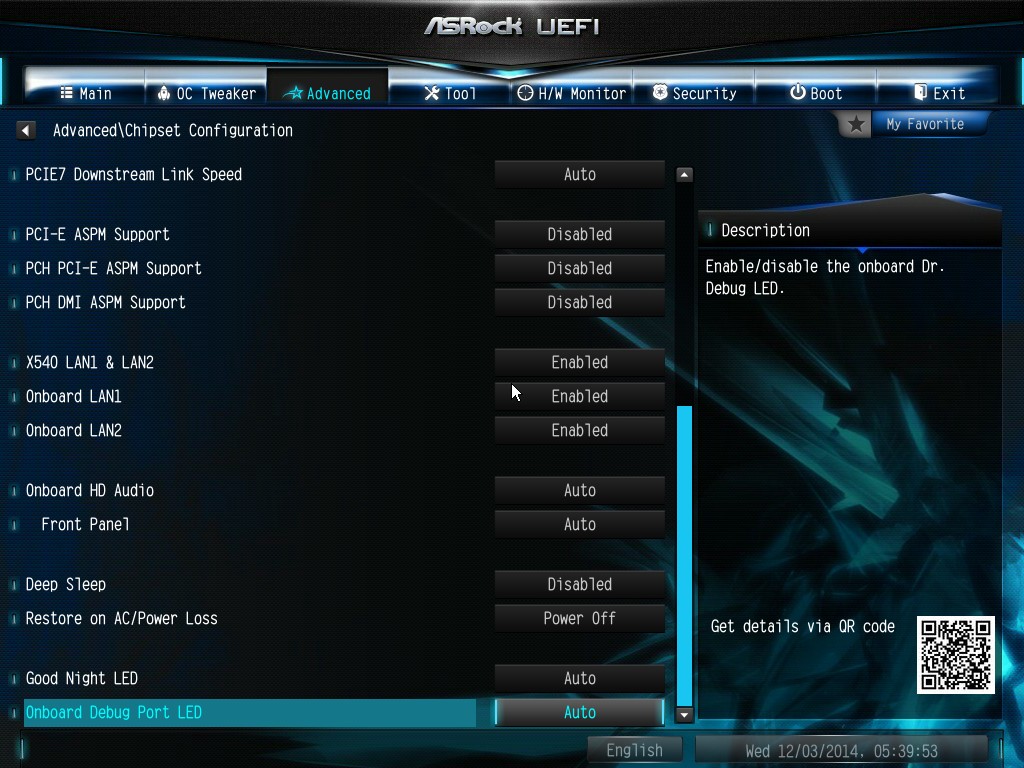
By default the ‘Above 4G Decoding’ is disabled, and I am surprised not to see an option here to enable the Thunderbolt header as is typically present in TB capable products.
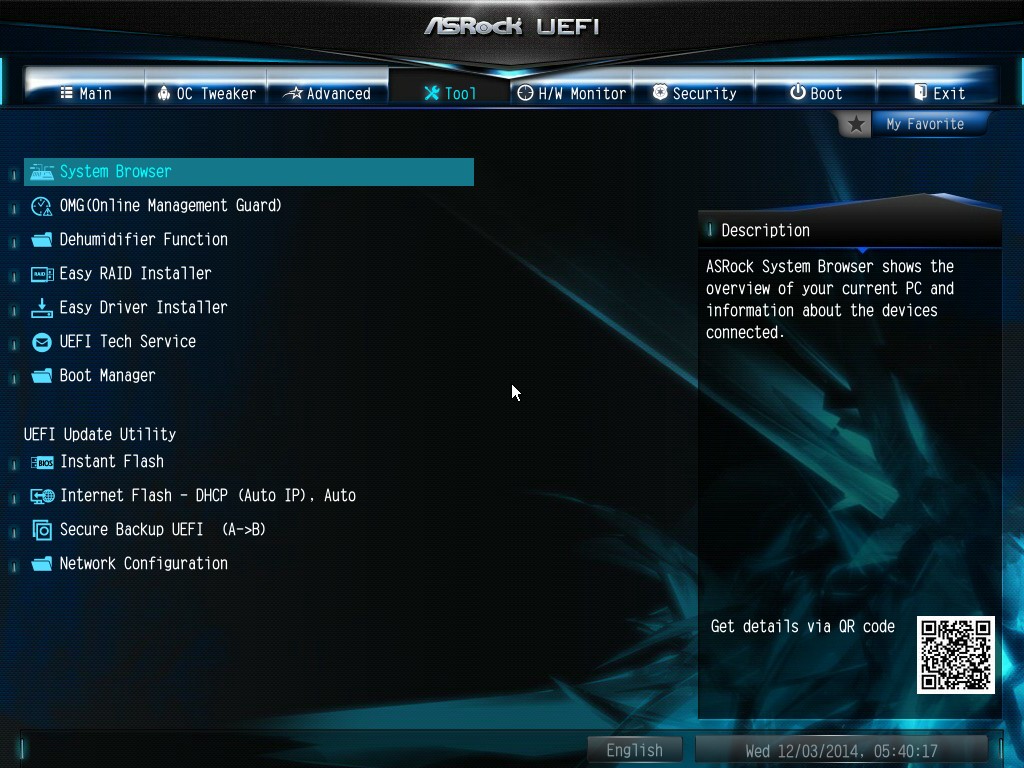
The Tools menu is typically where ASRock tries out its more unusual ideas, although we do not get anything new for X99 that we have not seen on Z97 already. The System Browser shows the different elements of the motherboard and what is detected:

The Online Management Guard (OMG) allows the user to enable or disable the network ports at various times of the day, as determined by the system time:
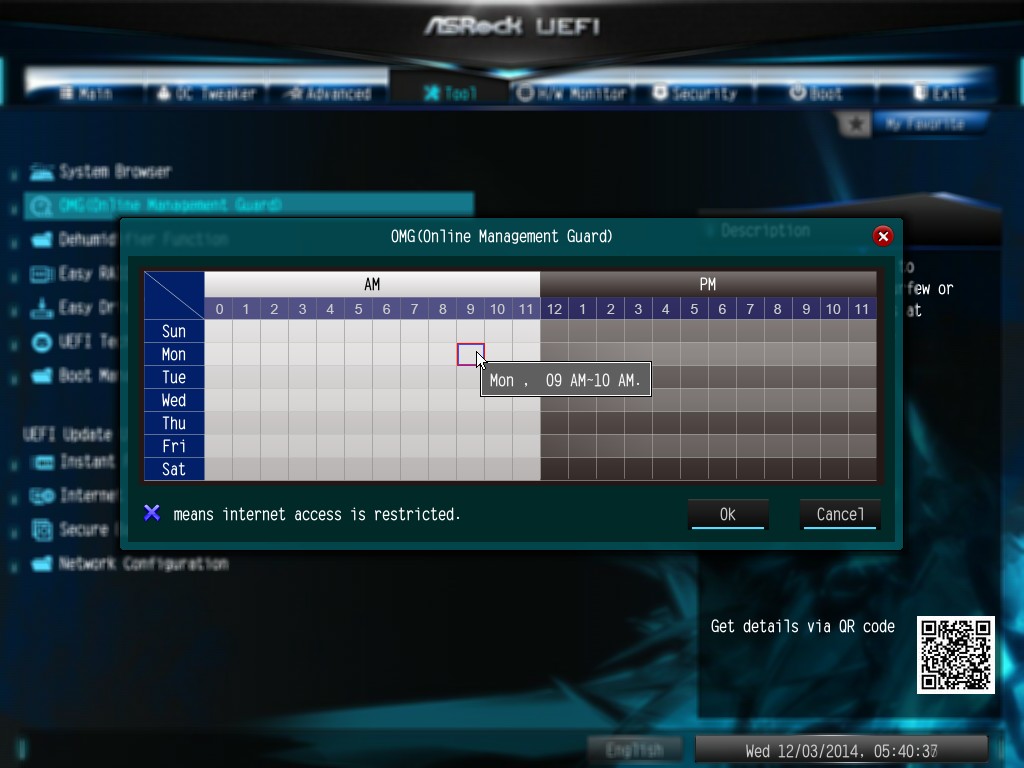
(It is amusing that this feature is aimed more at controlling when a child is allowed online, but X99 is not exactly a system configuration used as secondary machines.)
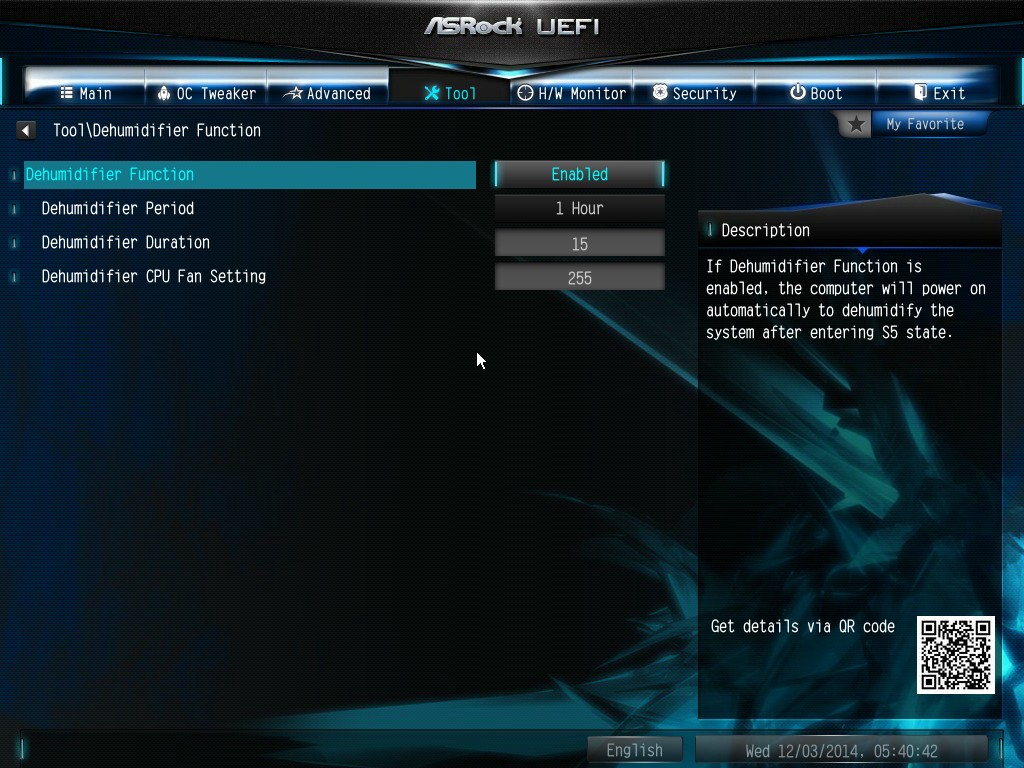
The Dehumidifier function now gets its own sub menu, allowing fans to spin for a fixed time after the machine is in S5:
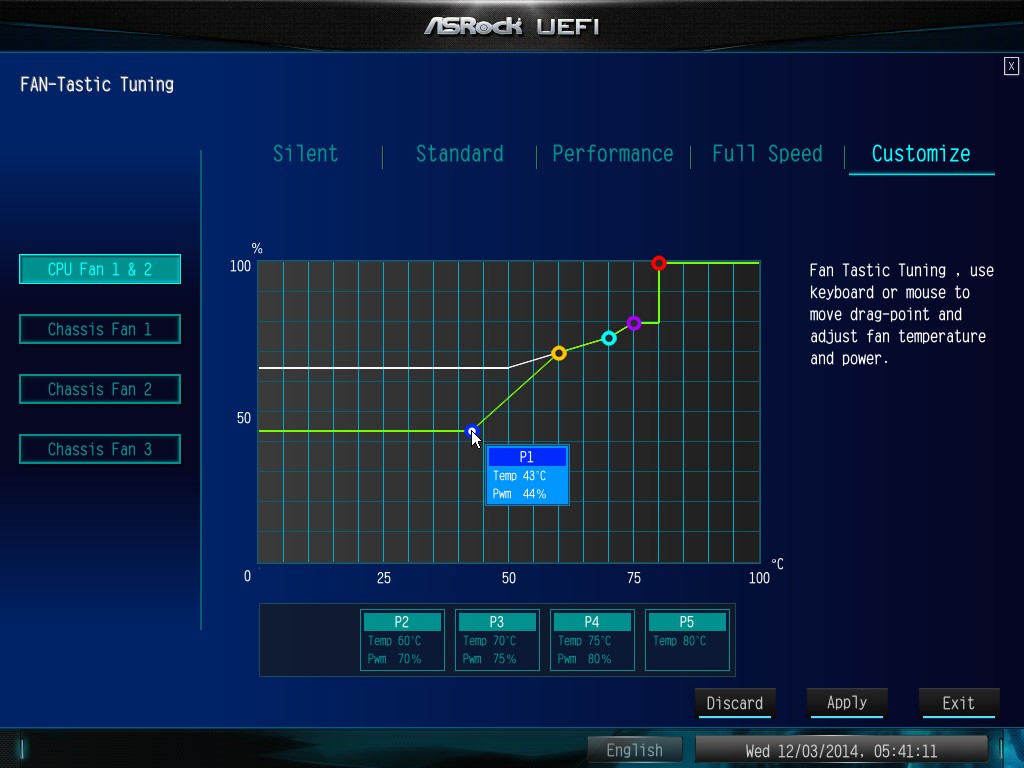
The H/W Monitor tab is where the temperatures, fan speeds and voltage monitoring tools are all kept, and we have seen an effort by the other manufacturers to improve the fan control situation. ASRock now joins them with the FAN-Tastic tuning option, moving into a more interactive type of scenario. This extends the multi-point gradient options into something more clickable, similar to the ASUS implementation. For example, a user can put a fan into one of five modes or customize the profile:
Rather than using the interface, users can do it the older way:
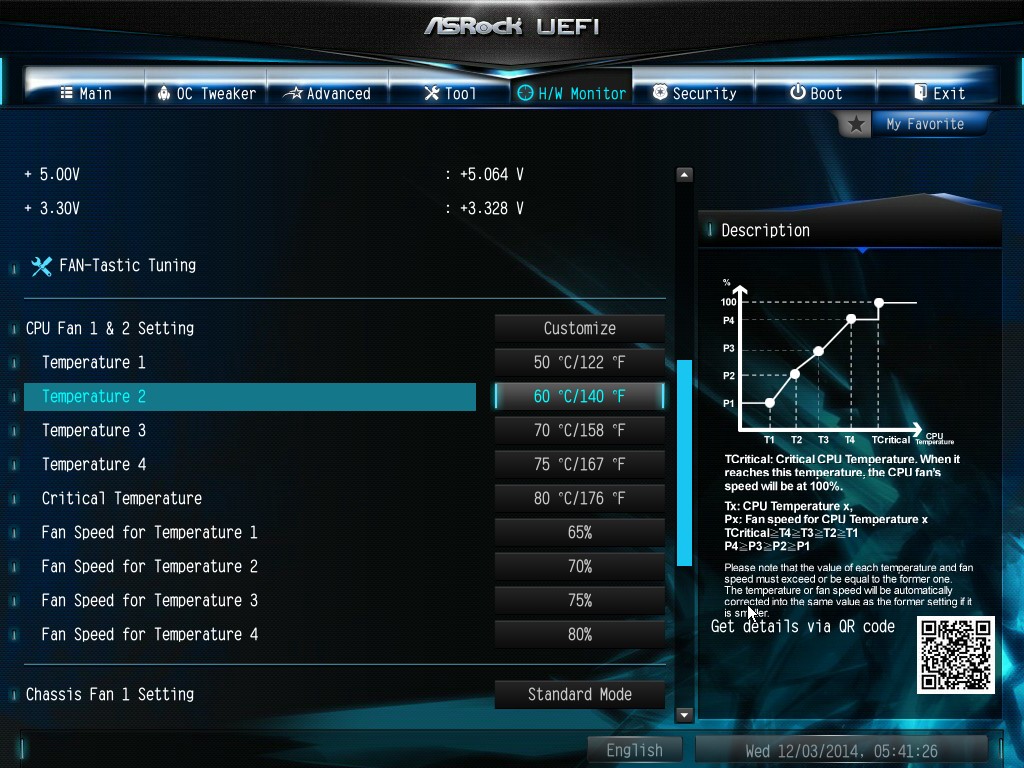
There is also an option to select which temperature sensor is being read from to make these adjustments.
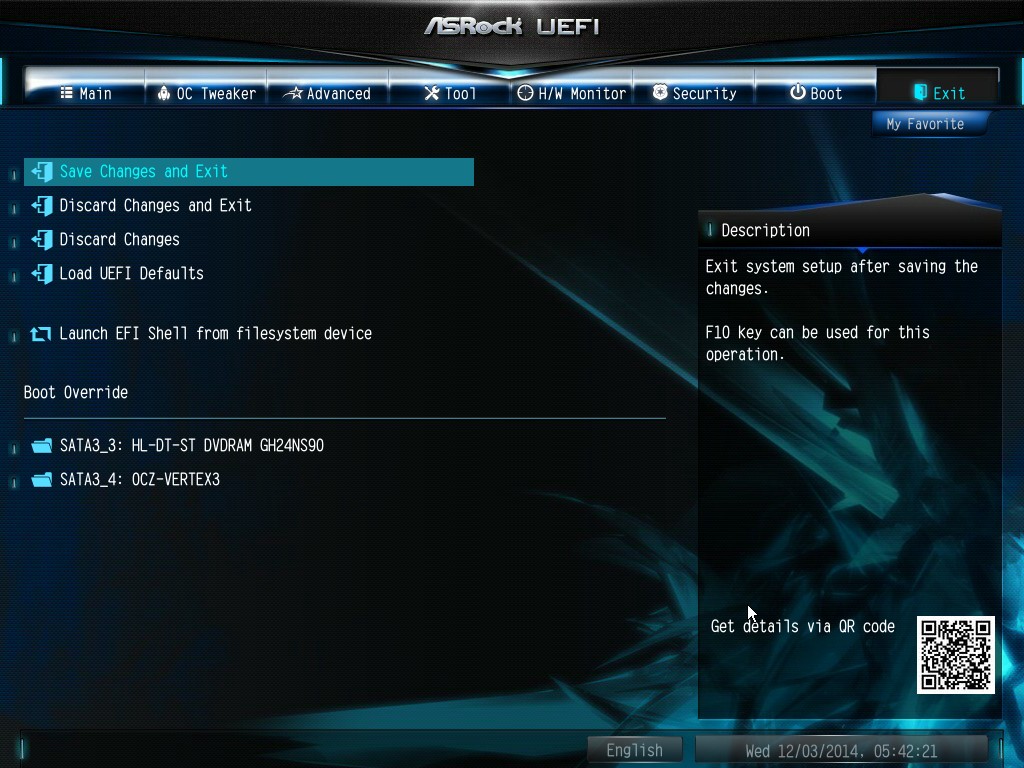
The rest of the BIOS deals with security, boot order and fast boot options. In the Save and Exit menu we do get options for Boot Override:


45 Comments
View All Comments
gsvelto - Tuesday, December 16, 2014 - link
Where I worked we had extensive 10G SFP+ deployments with ping latency measured in single-digit µs. The latency numbers you gave are for pure-throughput oriented, low CPU overhead transfers and are obviously unacceptable if your applications are latency sensitive. Obtaining those numbers usually requires tweaking your power-scaling/idle governors as well as kernel offloads. The benefits you get are very significant on a number of loads (e.g. lots of small file over NFS for example) and 10GBase-T can be a lot slower on those workloads. But as I mentioned in my previous post 10GBase-T is not only slower, it's also more expensive, more power hungry and has a minimum physical transfer size of 400 bytes. So if you're load is composed of small packets and you don't have the luxury of aggregating them (because latency matters) then your maximum achievable bandwidth is greatly diminished.shodanshok - Wednesday, December 17, 2014 - link
Sure, packet size play a far bigger role for 10GBase-T then optical (or even copper) SFP+ links.Anyway, the pings tried before were for relatively small IP packets (physical size = 84 bytes), which are way lower then typical packet size.
For message-passing workloads SFP+ is surely a better fit, but for MPI it is generally better to use more latency-oriented protocol stacks (if I don't go wrong, Infiniband use a lightweight protocol stack for this very reason).
Regards.
T2k - Monday, December 15, 2014 - link
Nonsense. CAT6a or even CAT6 would work just fine.Daniel Egger - Monday, December 15, 2014 - link
You're missing the point. Sure Cat.6a would be sufficient (it's hard to find Cat.7 sockets anyway but the cabling used nowadays is mostly Cat.7 specced, not Cat.6a) but the problem is to end up with a properly balanced wiring that is capable of properly establishing such a link. Also copper cabling deteriorates over time so the measurement protocol might not be worth snitch by the time you try to establish a 10GBase-T connection...Cat.6 is only usable with special qualification (TIA-155-A) over short distances.
DCide - Tuesday, December 16, 2014 - link
I don't think T2k's missing the point at all. Those cables will work fine - especially for the target market for this board.You also had a number of other objections a few weeks ago, when this board was announced. Thankfully most of those have already been answered in the excellent posts here. It's indeed quite possible (and practical) to use the full 10GBase-T bandwidth right now, whether making a single transfer between two machines or serving multiple clients. At the time you said this was *very* difficult, implying no one will be able to take advantage of it. Fortunately, ASRock engineers understood the (very attainable) potential better than this. Hopefully now the market will embrace it, and we'll see more boards like this. Then we'll once again see network speeds that can keep up with everyday storage media (at least for a while).
shodanshok - Tuesday, December 16, 2014 - link
You are right, but the familiar RJ45 & cables can be a strong motivation to go with 10GBase-T in some cases. For a quick example: one of our customer bought two Dell 720xd to use as virtualization boxes. The first R720xd is the active one, while the second 720xd is used as hot-standby being constantly synchronized using DRBD. The two boxes are directly connected with a simple Cat 6e cable.As the final customer was in charge to do both the physical installation and the normal hardware maintenance, a familiar networking equipment as RJ45 port and cables were strongly favored by him.
Moreover, it is expected that within 2 die shrinks 10GBase-T controller become cheap/low power enough that they can be integrated pervasively, similar to how 1GBase-T replaced the old 100 Mb standard.
Regards.
DigitalFreak - Monday, December 15, 2014 - link
Don't know why the went with 8 PCI-E lanes for the 10Gig controller. 4 would have been plenty.1 PCI-E 3.0 lane is 1GB per second (x4 = 4GB). 10Gig max is 1.25 GB per second, dual port = 2.5 GB per second. Even with overhead you'd still never saturate an x4 link. Could have used the extra x4 for something else.
The Melon - Monday, December 15, 2014 - link
I personally think it would be a perfect board if they replaced the Intel X540 controller with a Mellanox ConnectX-3 dual QSFP solution so we could choose between FDR IB and 40/10/1Gb Ethernet per port.Either that or simply a version with the same slot layout and drop the Intel X540 chip.
Bottom line though is no matter how they lay it out we will find something to complain about.
Ian Cutress - Tuesday, November 1, 2016 - link
The controller is PCIe 2.0, not PCIe 3.0. You need to use a PCIe 3.0 controller to get PCIe 3.0 speeds.eanazag - Monday, December 15, 2014 - link
I am assuming we are talking about the free ESXi Hypervisor in the test setup.SR-IOV (IOMMU) is not an enabled feature on ESXi with the free license. What this means is that networking is going to tax the CPU more heavily. Citrix Xenserver does support SR-IOV on the free product, which it is all free now - you just pay for support. This is a consideration to base the results of the testing methodology used here.
Another good way to test 10GbE is using iSCSI where the server side is a NAS and the single client is where the disk is attached. The iSCSI LUN (hard drive) needs have something going on with an SSD. It can just be 3 spindle HDDs in RAID 5. You can use disk test software to drive the benchmarking. If you opt to use Xenserver with Windows as the iSCSI client. Have the VM directly connect to the NAS instead of using Xenserver to the iSCSI LUN because you will hit a performance cap from VM to host in the typical add disk within Xen. This is in older 6.2 version. Creedance is not fully out of beta yet. I have done no testing on Creedance and the contained changes are significant to performance.
About two years ago I was working on coming up with the best iSCSI setup for VMs using HDDs in RAID and SSDs as caches. I was using Intel X540-T2's without a switch. I was working with Nexenta Stor and Sun/Oracle Solaris as iSCSI target servers run on physical hardware, Xen, and VMware. I encountered some interesting behavior in all cases. VMware's sub-storage yielded better hard drive performance. I kept running into an artifical performance limit because of the Windows client and how Xen handles the disks it provides. The recommendation was to add the iSCSI disk directly to the VM as the limit wouldn't show up there. VMware still imposed a performance ding on (Hit>10%) my setup. Physical hardware had the best performance for the NAS side.