NEC PA301w: The Baddest 30-inch Display Around
by Brian Klug on March 1, 2011 8:00 AM ESTOn Screen Display
Before we dive into the actual display performance numbers, it makes sense to talk about NEC's OSD and a little bit about the in-monitor calibration option that's offered.


Tapping the menu button brings up the OSD, but also enables some on-screen button labels that change accordingly as you move around inside. Rotate into portrait, and obviously buttons change - so too do the on-screen labels, which is awesome.
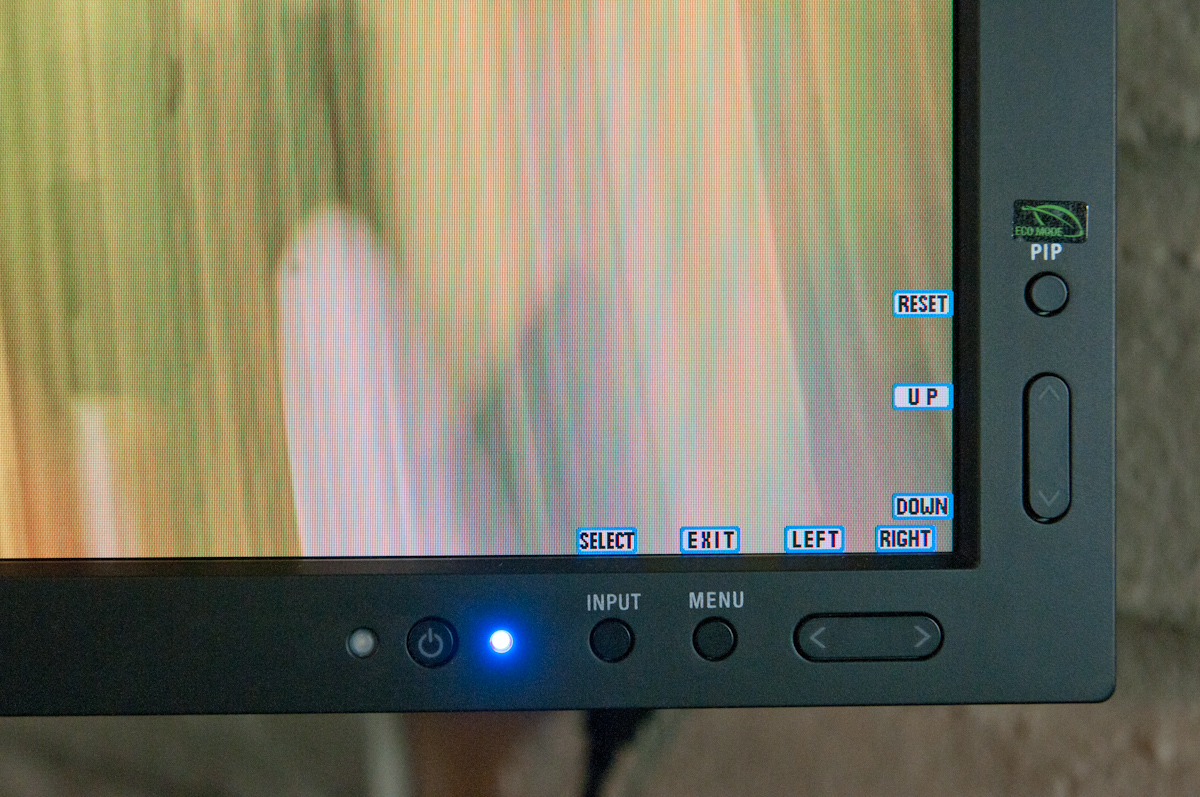
There are actually two sets of OSDs on the PA301w. The first is what you get when you hit menu, and is a nice (yet still comprehensive) skinned menu with pretty straightforward navigation. Settings for brightness, black, and eco mode are on the first tab, position and scaling are on the second, then color, tools, menu options, more eco settings, and finally the info tab. The second is the Advanced OSD I'll show in a moment.
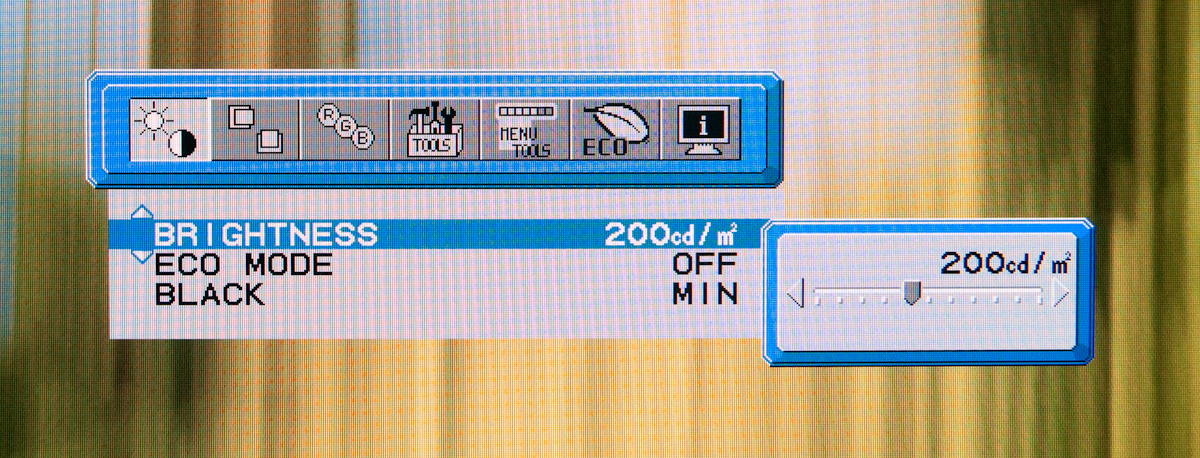
What's awesome about the settings is that everything has units where possible - brightness can be changed from 40 to 400 nits, black levels can also be artificially increased to match an adjacent display. As I'll show in a second, after you've run the in-monitor calibration, if you select a specific number, it'll actually drive the display relatively close to where it should be. What a breath of fresh air compared to completely arbitrary percentages.

Aspect ratio scaling options include full, aspect-correct, off (1:1), and custom, which is controlled from the advanced OSD. Inside the "RGB" tab are some basic color settings such as white point and simple color controls. Tools has PIP control if you want to use it, the USB port per video input mapping controls, some selection criteria for choosing video inputs, and off timer plus signaling. Menu tools is just OSD settings like position, color, and language.
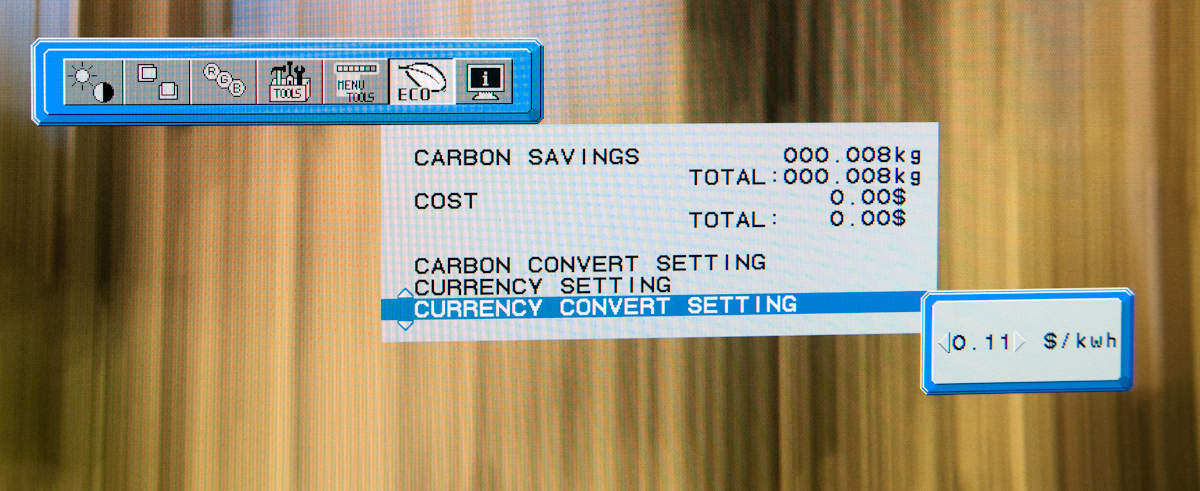
Inside "ECO" is some interesting stuff. Based on the configured price per kilowatt-hour, you can see the total electrical cost of using the monitor. In addition, based on the configured kg (of carbon) per kilowatt-hour, you can see how much carbon you've released indirectly. One field is for how much would've been used if you didn't have eco settings turned on, the other is how much you actually used. Both essentially enable some dynamic brightness based on ambient lighting measured on the front sensor - mode 1 corresponds to 200 nits of range, mode 2 corresponds to 100 nits.
What about that "advanced OSD?" Well, you can get to it two ways. Under the color tab, at the bottom, is a link named "Advanced Settings." Pressing select on that will bring you there, or you can get there by turning on the monitor by holding power and input at the same time. Doing so then makes the menu button consistently bring up the advanced OSD for the duration of the power-on session.
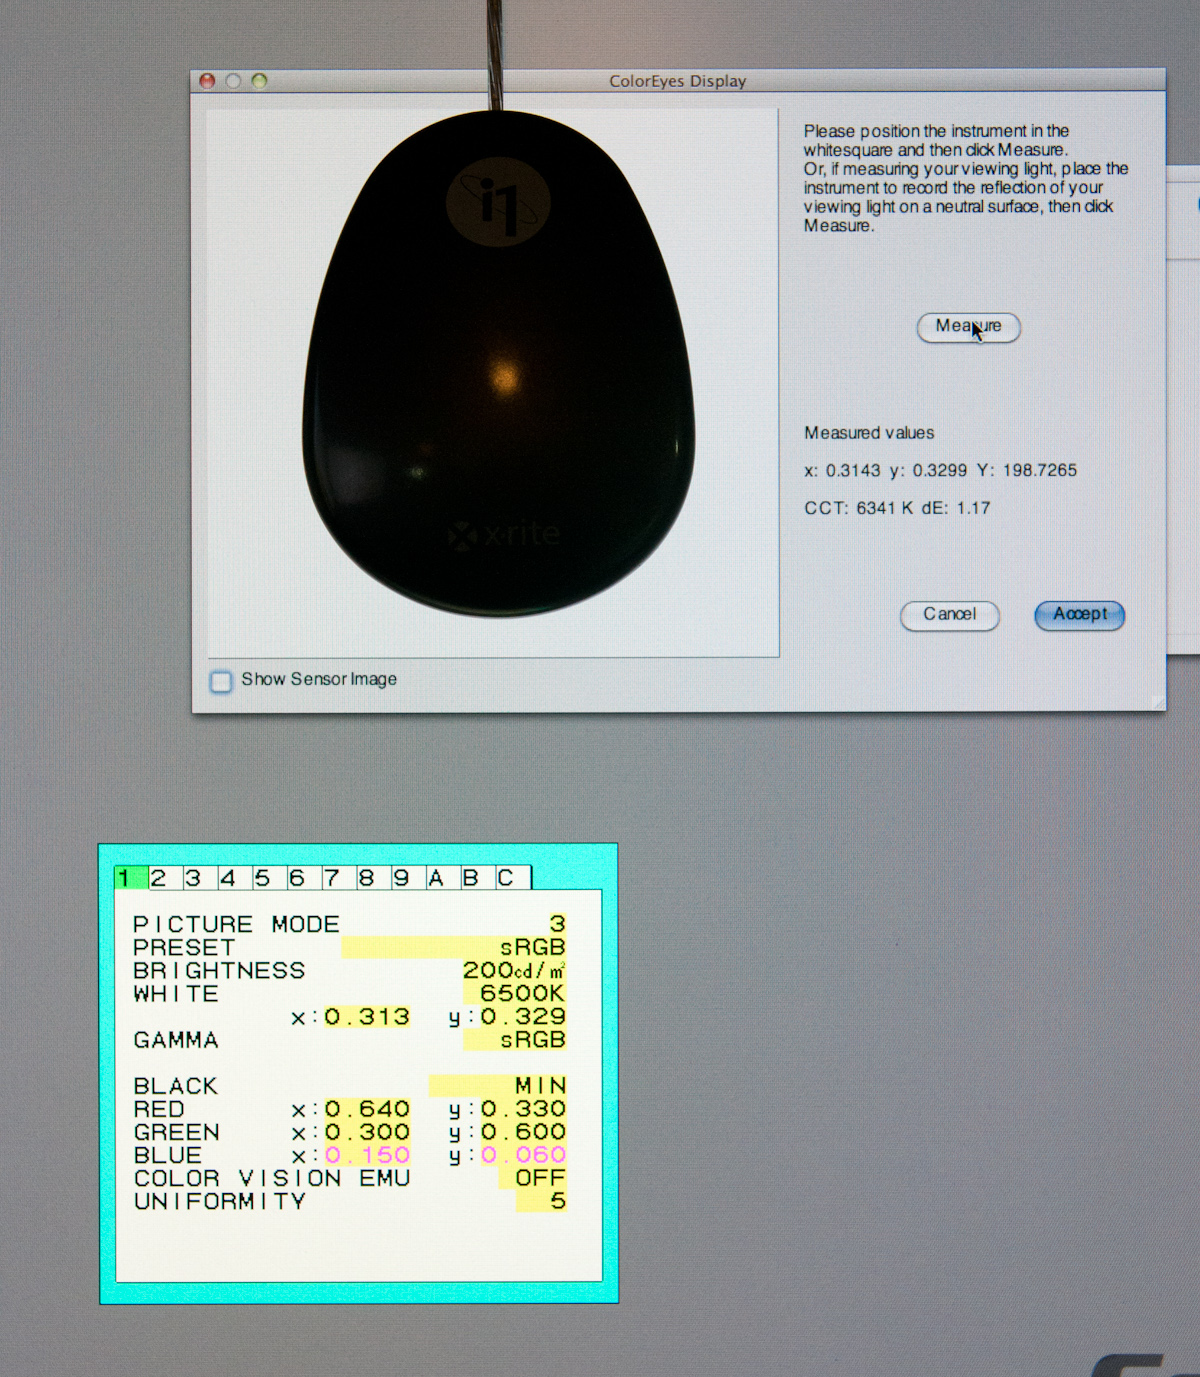
Inside are essentially the same options as the basic OSD, with more depth in the color/picture section and a few other places. White point and color tristimulus values are given in x and y, there's gamma control, and a new uniformity pane. If you're serious about getting color right, these are seriously useful. Initially however, things aren't that close to reality. Even though the white point is set at 6500K, we can see that measured value out of box is around 5600K. The color tristimulus points are also similarly completely wrong.

This is where the in-monitor calibration is super handy, as it internally calibrates the monitor so these settings actually reflect reality instead of remain shifted by however much the monitor has drifted or differs from ideal. Initially, I spent lots of time tweaking the display color points in HCFR, shifting appropriately based on how much the numbers differed from measured. While that actually did yield better results, running the built-in calibration routine got me 90% of the way there in 1 minute instead of 1 hour like I'm used to doing manually.
Internal calibration mode only works with x-rite i1D2 colorimeters. NEC has a rebranded version they sell in a bundle, or you can buy your own. Chances are if you're willing to spend $2k+ on an LCD, you're also willing to spend the $200 to get an i1D2. Again, it plugs into the right-side USB port. To get into calibration mode, either find stand-alone calibration in tab B of the menu, or press the left and right keys at the same time from the no signal screen. The display will initialize the sensor, then tell you to wait 30 minutes for the CCFL to settle - welcome to how long calibrating CCFL backlit displays usually takes in-between adjustments.
After that, you can select "self" for self calibration, or "copy" mode to actually match another PA301w or another display entirely. The display will prompt you to stick the colorimeter in the center, then run through its tests. The actual set of tests seems very basic - red, green, blue, then a whitepoint and brightness test. It takes almost exactly one minute to run, then tells you it's all done.


The results are awesome. After running through, the white point is much closer to the actual reported value, and the primary color tristimulus values are much closer to what they should be. Note below how the brightness value and color temperature value are now much closer than they were pre-calibration.
The even better part is that the presets also now correctly work for mapping to different color spaces. If you try to use them without calibration, you risk being offset depending on how the monitor has drifted. I still ended up tweaking all six of the x y values for red green and blue, but they were much, much closer than before.


92 Comments
View All Comments
Shadowmaster625 - Tuesday, March 1, 2011 - link
Imagine gaming with 3 of these. wowee wowee wowee.Now imagine having to work for weeks on end to be able to pay for them. lol
ImSpartacus - Tuesday, March 1, 2011 - link
I'm definitely not educated on the subject, but wouldn't the response time be detrimental to most gaming?But from a purely size and resolution standpoint, it would be pretty neat.
DanNeely - Tuesday, March 1, 2011 - link
If it's the same 2 frames as the 3090 had it's only really going to be an issue in FPSes at higher skill levels and on a low latency connection. For anything else it's fine.softdrinkviking - Tuesday, March 1, 2011 - link
I have the 24" version of this. (it's available where I live) and it's fine for gaming. There is some acceleration hardware inside that seems to work well. It's fine for sports or movies to me.Perhaps you are more sensitive than I, but I think it looks fantastic.
Interesting note though. The contrast ratio on the NEC PA series monitors that I've seen is 800:1, whereas the other series they make, the LCD2409, 2609, ect, are H-IPS, and list a higher contrast ratio of 1000:1.
I noticed this when shopping, printed on all the little spec cards at the store.
I wonder if this is a trade-off for the better color depth of the S-IPS panels?
I understand that the contrast numbers given can vary in actual meaning, but I'm assuming NEC uses the same criteria for contrast across its professional line.
Stas - Wednesday, March 2, 2011 - link
Because size matters...thereaderrabbit - Tuesday, March 1, 2011 - link
The kilowatt is equal to one thousand (10^3) watts. I think this is what you mean by Kill-A-Watt.LukeDK - Tuesday, March 1, 2011 - link
A Kill-A-Watt is a device used for measuring power consumption (or voltage, current, frequency, etc) at the plug.LTG - Tuesday, March 1, 2011 - link
So nice to see someone point out a correction without insult or condescencion.MobiusStrip - Tuesday, March 1, 2011 - link
He must be new to the Internet.Stas - Wednesday, March 2, 2011 - link
What a wuss